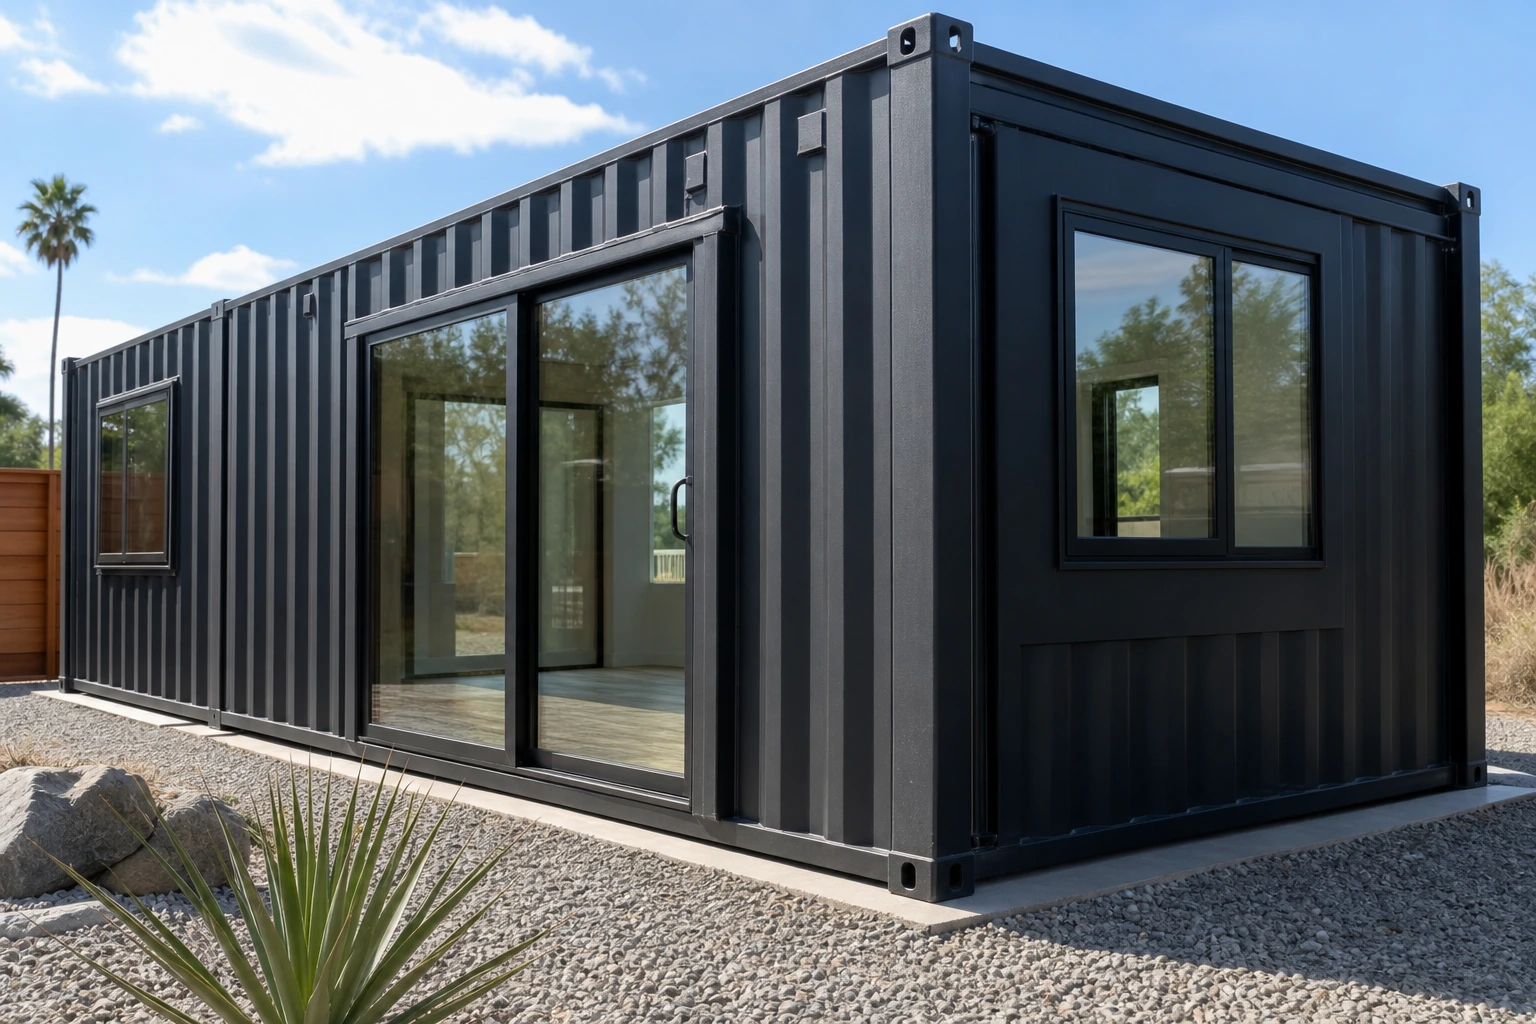
Turning shipping containers into a comfortable home requires more than cutting openings and adding walls. Every door, window, steel frame, and layer of insulation has to work as part of one complete enclosure. If gaps remain around the openings or steel connections interrupt the insulation, the home can lose energy, collect condensation, and become vulnerable to water intrusion.
Designing openings around light, cost, and structure
Glass can transform the feeling of a shipping container home, but every opening comes with a tradeoff. Windows and glazed doors add natural light, views, and a stronger connection to the outdoors. They also increase material costs and require portions of the corrugated container wall to be removed and reinforced.
Ben kept most of the glass to a minimum but invested in one dramatic feature: two large bifolding door systems installed parallel to one another. When opened, the doors allow the interior and exterior living areas to feel like one continuous space.
Bifolding doors can create a wider opening than conventional sliding doors, but they may also be more complicated to install and operate. For this vacation home, the visual impact and access to the view were worth the additional complexity.
Before choosing large windows or doors, consider:
- The value of the view and natural light
- The cost of the glass and door system
- The amount of container wall that must be removed
- The reinforcement required around the opening
- Solar heat gain and energy performance
- Weather exposure and water management
- The space required for panels to swing or fold
The best design is not necessarily the one with the most glass. It is the one that balances comfort, structure, budget, and the way the home will actually be used.
Reinforcing shipping container openings
Cutting a large opening changes the way forces travel through a container wall. In this project, welded steel frames were installed around the openings before the doors and windows were added.
Ben used tube steel for the main frames, but he later explained why angle steel may be a better choice for some container openings.
Corrugated steel is difficult to cut perfectly. Even with careful work, gaps of approximately one-eighth to one-quarter inch can remain between a tube-steel frame and the container wall. Tube steel can also be difficult to position because there is no flange or positive stop to hold it against the corrugations. Its rounded corners slope away from the sheet steel, further complicating the weld.
Angle steel offers several potential advantages:
- A flange can overlap the container wall
- The overlap helps manage wind-driven rain
- The frame has a positive stop during installation
- Small cutting errors remain covered
- The flange creates accessible welding points
- Gaps behind the flange can be insulated and sealed
- The finished exterior may look cleaner
In Ben’s example, the angle-steel concept provided approximately three inches of overlap. That means the weather barrier does not depend entirely on a narrow bead of sealant.
The correct reinforcement still depends on the size and position of the opening, the building design, and local structural requirements. An engineer should specify framing for large openings, stacked containers, removed sidewalls, or modifications near major structural components.
Adding steel trim and rain-shedding details
The project used one-eighth-inch plate steel around the large door frames to create visual separation between the corrugated wall and the doors. This trim also provided some shading on the south side of the home.
The team measured the upper piece in place before cutting it to length. The side pieces were cut at a slight angle so the top would slope outward and shed water.
That small slope is an important detail. Horizontal steel ledges should not direct water toward the opening or allow it to pool against sealant. Exterior trim, flashing, and overhangs should move water down and away from the door or window.
Before welding trim near installed glass, protect the entire window or door. Sparks and hot metal spatter can permanently damage glass, coatings, frames, and weather seals.
The backside of concealed steel pieces should also be protected before installation. Ben’s team used a rusty-metal primer. The appropriate coating and welding procedure should be confirmed for the steel, exposure, and chosen finishing system.
Installing large bifolding doors
The bifolding doors arrived unassembled, which made them easier to transport to the site. Before setting the frames, the team installed one-inch-thick wood strips within the steel openings.
They positioned each door frame, checked it for level, added shims where needed, and fastened through the frame into the surrounding wood. They took care not to overdrive the screws, since excessive pressure could bend or twist the frame.
Once the frame was secure and square, the individual door panels could be installed.
The basic principles apply to most large door systems:
- Confirm the rough opening and finished-floor height.
- Create a level, stable sill.
- Dry-fit the frame before fastening it.
- Check the head and sill for level.
- Check both sides for plumb.
- Compare diagonal measurements to confirm the frame is square.
- Add shims at the manufacturer’s specified fastening points.
- Tighten fasteners gradually without distorting the frame.
- Install and adjust the panels according to the manufacturer.
- Test the complete operating and locking sequence.
Large folding doors are especially sensitive to small alignment errors. A frame that is slightly out of level or square can cause dragging panels, uneven gaps, water leaks, or difficult operation.
Filling gaps without distorting the frames
Gaps remained between the welded steel openings and the door frames. The team filled the exterior gaps with a fire-resistant spray foam before covering them with angle steel and flat bar.
Around the interior sides of the windows and doors, they used a low-expansion foam made specifically for window and door installations. This distinction matters because ordinary expanding foam can exert enough pressure to bow a frame and interfere with its operation.
Ben found that foam was easier to control when applied in multiple passes. Trying to fill a deep cavity all at once created excessive expansion and a large cleanup job. After the foam cured, he trimmed it flush before adding the metal trim.
For a cleaner installation:
- Use the foam specified for the location and assembly
- Confirm compatibility with the frame, sealants, and coatings
- Fill deep spaces gradually
- Allow each application to expand as directed
- Do not use foam as the only method of flashing or waterproofing
- Trim it only after it has fully cured
- Keep it protected from sunlight and weather exposure
If welding will occur near foam or other combustible material, the assembly and work sequence must be reviewed carefully. Products marketed as fire-blocking foam are not automatically safe for direct flame or unrestricted welding exposure. Follow the product instructions and hot-work safety requirements.
Installing the windows
For one window, the team applied caulk inside the steel frame and fastened the window through its nailing flange with self-tapping screws. Additional 2-by-4 framing was installed around the unit to support interior fastening and finishing.
After completing the work, Ben said he would approach the detail differently next time. He would install the windows from the exterior and add a second trim piece over the nailing flanges.
That observation highlights one of the benefits of testing details before repeating them across an entire project. The first installation can reveal problems with sequencing, fastening access, flashing, trim coverage, and appearance.
Window placement should follow the manufacturer’s instructions and the project’s water-management design. The exterior assembly needs a clear drainage path, while the interior needs a continuous air seal that does not block intended drainage.
Combining rigid insulation with spray foam
Ben noted that a professionally applied spray-foam system would often be specified for a design like this. Because the team wanted to complete the insulation themselves, they chose rigid foam panels for the larger cavities and canned spray foam for irregular gaps.
They used a combination of two-inch, one-inch, and half-inch rigid insulation to fit between the wood framing. The pieces could be measured and cut with a utility knife. Spray foam was then applied around the edges and in the irregular spaces that would be difficult to fill with rigid panels.
This hybrid approach uses each material where it performs best:
- Rigid foam fills large, regular areas
- Thin layers make it easier to fit varying cavity depths
- Spray foam seals edges, corners, and irregular penetrations
- Taped seams help connect layers into a more continuous air barrier
The success of this approach depends on careful cutting and sealing. Loose panels with open edges allow air to move behind the insulation, reducing performance and increasing the chance of condensation against the cold container steel.
What the team learned from an expanding-foam mess
One of the largest gaps occurred where the container corners met the wood framing. Ben tried filling the cavity with repeated applications of spray foam, but the material continued expanding and became difficult to control.
Several factors contributed to the problem. Too much foam was applied too quickly, and the desert air was very dry. Some moisture-cured foam products expand and cure more consistently when the surfaces receive a light mist of water, as long as the manufacturer recommends it.
The team improved the process by placing scraps of rigid insulation in the large gaps first. The scraps reduced the amount of foam required and provided backing around which the foam could expand.
The broader lesson is to avoid treating canned foam as a bulk cavity-filling material. In large voids, properly selected backing or rigid insulation can provide shape and reduce waste. Always follow the foam manufacturer’s limits for layer thickness, moisture, ventilation, temperature, and curing time.
Creating continuous floor insulation
The containers already had insulation between the steel floor joists, but the steel members still created thermal bridges. The team added continuous insulation above the original plywood container floor to reduce heat flow through those joists.
For part of the house, they used two-foot-by-four-foot insulated subfloor panels made from OSB laminated to foam. The panels were easy to handle, cut with a circular saw, and adhere to the floor with a compatible subfloor adhesive.
Near the doors, the OSB portion was trimmed so the foam could extend beneath the threshold. This helped connect the floor insulation to the door detail.
When those panels ran out, the team used a second assembly in another container:
- They fastened the original plywood floor panels back into position.
- They installed 2-by-4s laid flat at 16 inches on center.
- They filled the spaces with 1.5-inch rigid foam.
- They installed a new plywood layer over the framing and insulation.
Both systems raised the finished floor, so door thresholds, ceiling height, stairs, cabinetry, and accessibility should be planned before construction begins.
Insulating the ceiling around structural connections
The roof and ceiling assembly had to work around steel connections, wood framing, sprinkler piping, and recessed fixtures.
The first continuous two-inch layer of insulation rested on top of the double 2-by-4 top plate and met the two-inch tube-steel framing. Wood ceiling joists were installed with hangers, and another continuous two-inch layer was placed above them. Additional insulation filled the joist cavities, although some areas had to be removed for sprinklers and lights.
Every interruption reduces the continuity of the insulation layer. Mechanical, electrical, and fire-suppression systems should therefore be coordinated before the last layers are installed. This minimizes rework and prevents unnecessary gaps.
Complete rough-ins before closing the walls
The team began the electrical rough-in before covering the framing. This was the final opportunity to confirm the location of switches, outlets, wiring, lights, and other equipment.
The local code also required a residential fire-sprinkler system. The insulation and interior finishes could not be completed until the specialty installer had placed the pipes and sprinkler heads.
Before closing a shipping container wall, walk through the entire building and verify:
- Electrical boxes and wiring
- Plumbing and drains
- HVAC lines and ventilation
- Fire-sprinkler pipes and heads
- Window and door fasteners
- Structural connections
- Air-sealing details
- Insulation behind difficult corners
- Blocking for cabinets, shelves, and fixtures
Photographing the open walls can also provide a useful record of hidden framing and utilities.
Interior sheathing and drywall
The structural engineer required half-inch sheathing across the interior walls. Although Ben felt the requirement was conservative, he followed the engineered specification. The continuous wood layer also made it easier to attach pictures and other objects after the drywall was installed.
The team initially used OSB, then switched to plywood. Once the framing, utilities, sheathing, and insulation were complete, an experienced drywall crew installed the gypsum board, taped and mudded the seams, finished the corners, and applied a skim coat.
Ben recommends hiring skilled drywall finishers. A professional crew completed the house quickly and produced a flatter, cleaner surface than most occasional DIYers could achieve without extensive sanding.
Understanding effective R-value
The project achieved roughly R-19 to R-21 in the walls, a nominal R-46 in the floor, and a nominal R-48 in the roof. However, Ben correctly noted that insulation interrupted by steel framing will not perform as well as the same stated R-value in a continuous layer.
Steel conducts heat much more readily than insulation. When steel members pass through an insulated assembly, they create thermal bridges that lower the whole-wall performance.
For that reason, continuous insulation is especially valuable in container construction. It covers structural members and reduces direct paths between indoor and outdoor temperatures.
R-values should not simply be added without considering framing, fasteners, gaps, compression, moisture, installation quality, and thermal bridging. Energy-code compliance should be evaluated using the complete assembly and the requirements for the project’s climate zone.
Using passive-solar overhangs
Passive-solar design uses predictable seasonal sun angles to improve comfort. On a properly oriented wall, an overhang can block the high summer sun while allowing the lower winter sun to enter and warm the interior.
The correct overhang size depends on:
- Geographic location
- Building orientation
- Window height and position
- Seasonal sun angles
- Local climate
- Shading from nearby objects
- Glass performance
- Heating and cooling goals
For this project, Ben began with relatively short overhangs. Because he planned to live in and monitor the home, he could measure their performance and extend them later if needed.
That adjustable approach suited an experimental personal project, but most homes benefit from calculating the shading geometry during design. A local architect, energy modeler, or passive-solar design tool can help size the overhangs before fabrication.
Test one section before repeating the system
No one on Ben’s team had built a shipping container home before. Instead of immediately repeating an untested detail throughout the house, they completed one small wall section first.
That mockup allowed them to see how the framing, insulation, sheathing, penetrations, and finishes came together. They could then make better decisions before applying the system to the remaining containers.
This is one of the most valuable lessons from the project. A small test section can reveal conflicts that drawings do not show, including:
- Unreachable fasteners
- Awkward trim transitions
- Insulation gaps
- Difficult welding locations
- Incorrect material thicknesses
- Problems with the order of installation
Correcting one mockup is far easier and less expensive than rebuilding the same detail throughout an entire home.
Build the enclosure as one connected system
Doors, windows, framing, flashing, insulation, electrical work, and interior finishes cannot be planned independently. Each layer affects the next.
The strongest lessons from this project are to reinforce openings before installing doors and windows, slope exterior steel to shed water, protect glass during welding, use low-expansion foam around frames, create continuous insulation wherever possible, and complete all rough-ins before closing the walls.
Most importantly, work from engineered plans and test complicated details early. Shipping containers can create distinctive homes, but their thin corrugated walls and highly conductive steel require careful solutions for structure, moisture, and energy performance.
Watch Ben’s complete demonstration in Building a Shipping Container Home | EP03 Doors, Windows, and Insulation.
Need containers for a custom building project?
Quality Containers can help you select the right shipping containers for storage, construction, or a custom conversion. Contact our team to discuss available sizes, container conditions, delivery, and modification options for your project.
Safety note: Cutting, welding, insulating, and modifying shipping containers can cause serious injury, fire, toxic-fume exposure, water damage, and structural failure. This article is educational and does not replace engineered plans, local permits and inspections, product instructions, or qualified trade professionals.
No comment yet, add your voice below!