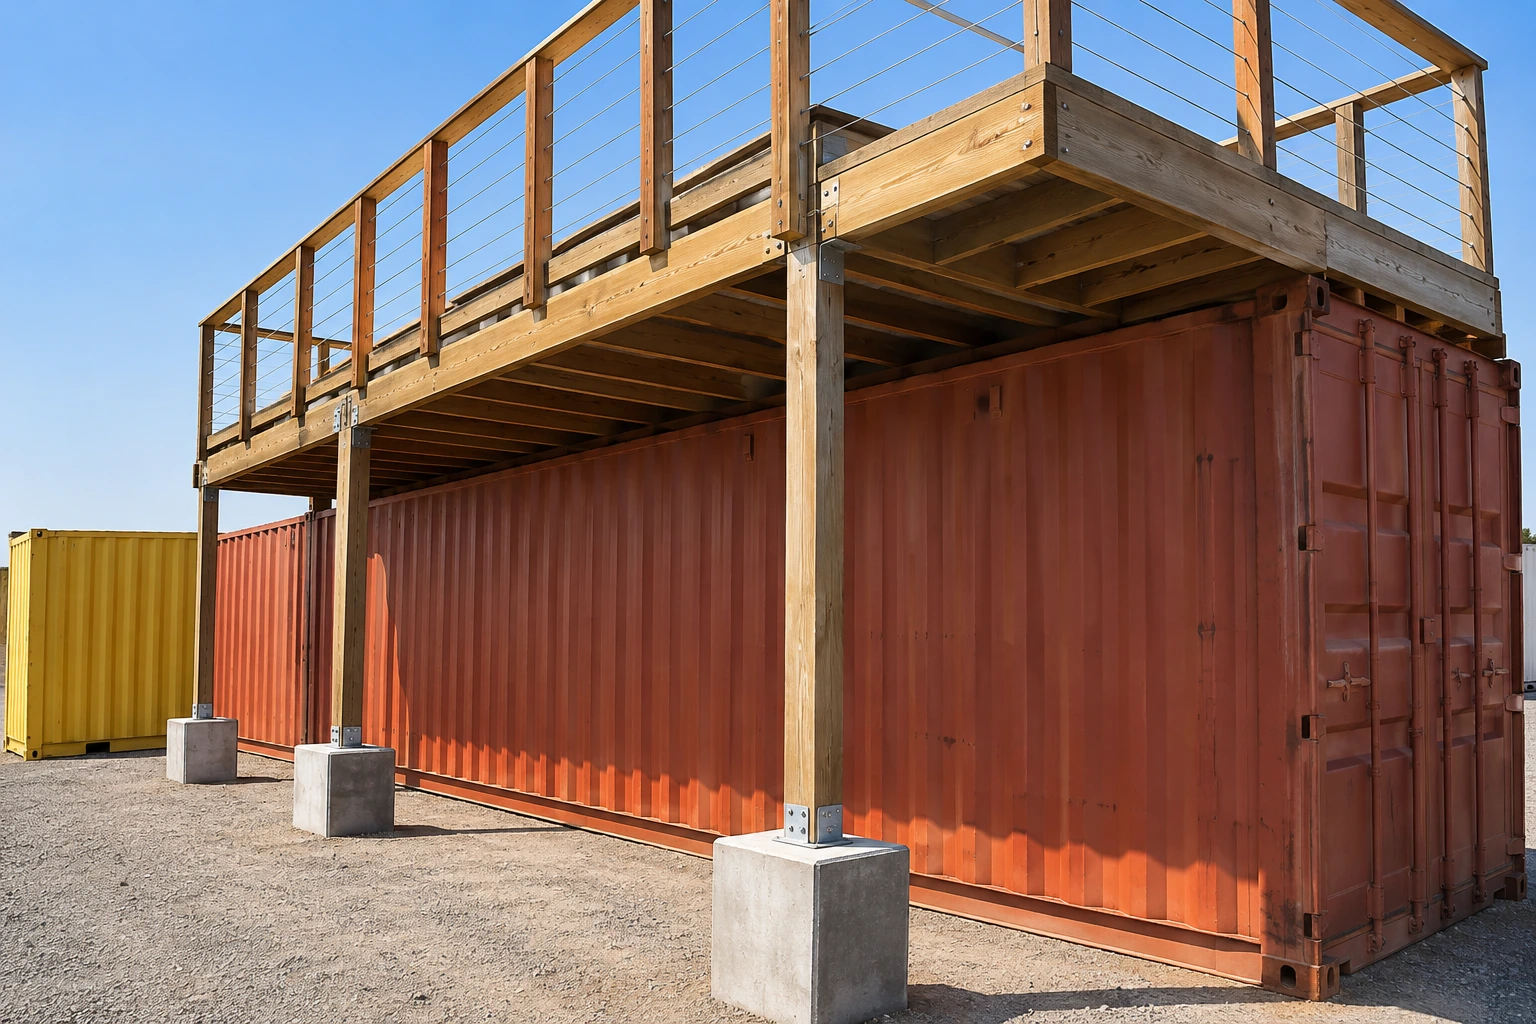
A wooden deck can add usable outdoor space to a shipping container build, but the support system takes some planning. For this project, we wanted to raise the deck above the container and reduce the amount we needed to spend on lumber.
Our approach was to add intermediate steel supports beneath the main wooden beams. That shortened the distance between support points and left room for a separate roof layer underneath the deck.
Here’s how we laid out, fabricated and installed those supports.
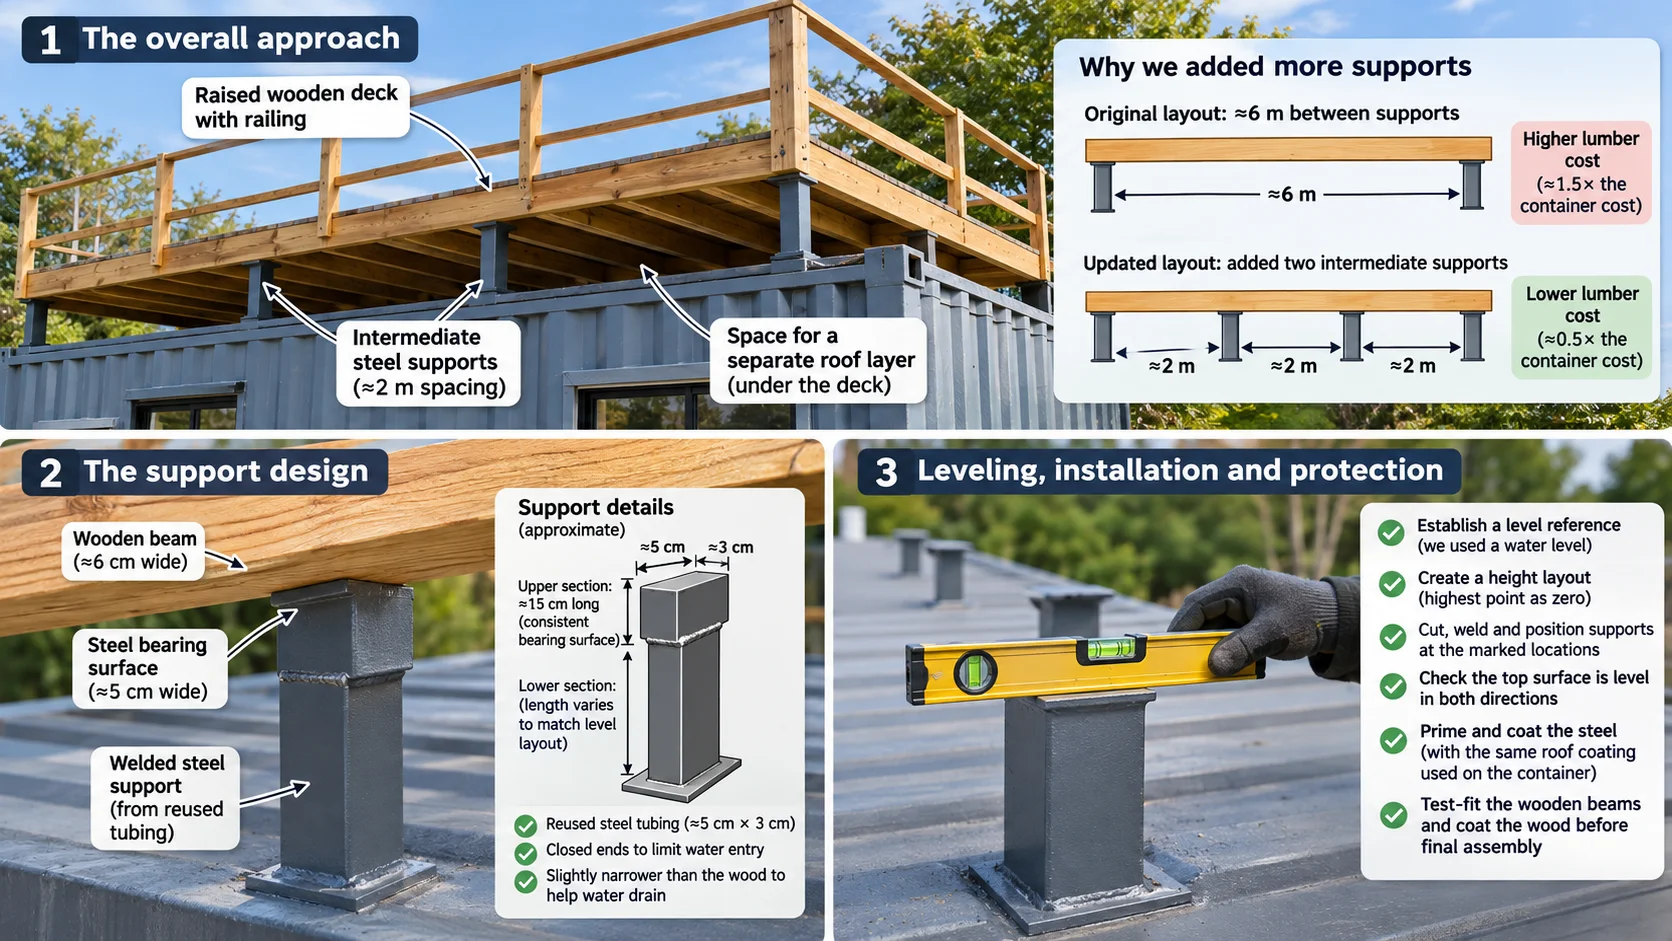 Why we added more supports
Our original layout had support points roughly six meters apart. With that much distance between them, we were looking at much larger wooden beams and a higher lumber bill.
Adding two supports between the existing points reduced the spacing to approximately two meters. In our project estimate, that brought the lumber cost down from about one and a half times the cost of the container to roughly half the container’s cost.
Those figures were specific to this build. Lumber prices, deck dimensions and structural requirements will affect the cost of another project.
The raised supports also created space between the container and the wooden deck for the roof layer we planned to install underneath.
Establishing a level reference
Before cutting any steel, we needed to figure out the height of each support.
A shipping container might look level, but small differences become noticeable when you start laying long beams across it. We found that some points were a few centimeters lower than others.
We used a water level to compare the planned support locations, then drew a layout showing the height adjustment needed at each point.
We treated the highest point as our zero reference. From there, we marked how much height each lower location needed to reach the same level.
That gave us a cutting plan instead of guessing as we went.
Reusing leftover steel
We had steel tubing left over from framing the window openings, so we used that material to fabricate the supports.
The tubing measured approximately five centimeters by three centimeters. We cut the upper support pieces to about 15 centimeters long, then prepared the lower sections according to the height needed at each location.
The idea was to make supports with a consistent upper bearing surface while adjusting their overall height to match our layout.
Reusing the leftover material helped keep the project budget down, although the suitability of any reused steel still needs to be checked for the intended load.
Leaving room for water to drain
The wooden beams in this layout were approximately six centimeters wide, while the steel bearing surface was about five centimeters wide.
We made the support slightly narrower than the beam to reduce the chance of water collecting on an exposed steel ledge beside the wood.
We also closed the open ends of the tubing to limit water entering the supports.
These details were part of our effort to manage moisture around the connections. They don’t replace proper waterproofing and drainage for the overall deck and roof assembly.
Welding and positioning the supports
With the pieces cut, we welded the upper and lower sections together and positioned the supports at their marked locations.
Getting each support level took more attention than fabricating it. The surface beneath a support wasn’t always perfectly flat, so matching the planned height alone wasn’t enough.
We checked the upper bearing surface in both directions before completing the attachment. Each support needed to sit level across its width and length so the wooden beam could bear evenly.
The connection between the support pieces was especially important because it formed part of the load path. Closing the tubing ends served a different purpose: keeping water out.
For another build, the support sizes, welds and attachment locations need to follow a structural design for that container and deck. The measurements here describe this project rather than a universal construction plan.
Protecting the steel
After welding, we primed and coated the supports to protect the exposed steel.
We then applied the same roof coating used elsewhere on the container. The goal was to cover the fabricated pieces and the areas affected by welding before installing the wood above them.
Coating selection should suit the steel, existing finish and exposure conditions of the project.
Checking the fit before building the deck
At this stage, the steel supports were installed, but we hadn’t placed the wooden beams yet.
That was the next check. Setting the beams in position would show whether the support heights and alignment needed further adjustment before assembly.
We also planned to coat the wood before putting the deck together, making it easier to reach surfaces that would become difficult to access later.
The biggest lesson from this stage was how much the support layout influenced the project. Adding intermediate supports changed our lumber estimate substantially, while careful leveling helped prepare the assembly for the next step.
Planning your shipping container project
At Quality Containers, we help customers explore shipping containers for storage, custom modifications and other projects. If you’re planning a container build, contact our team to discuss the container options available for your needs.
Adapted into a first-person walkthrough from “Shipping Container Wooden Deck Support (Price reduction),” Living Tiny Project, Episode 014. Watch the original video.
For deck framing details, the American Wood Council's prescriptive deck construction guide (DCA 6) is a widely used reference, and OSHA's fall protection guidance applies whenever you work on a raised deck or container roof.