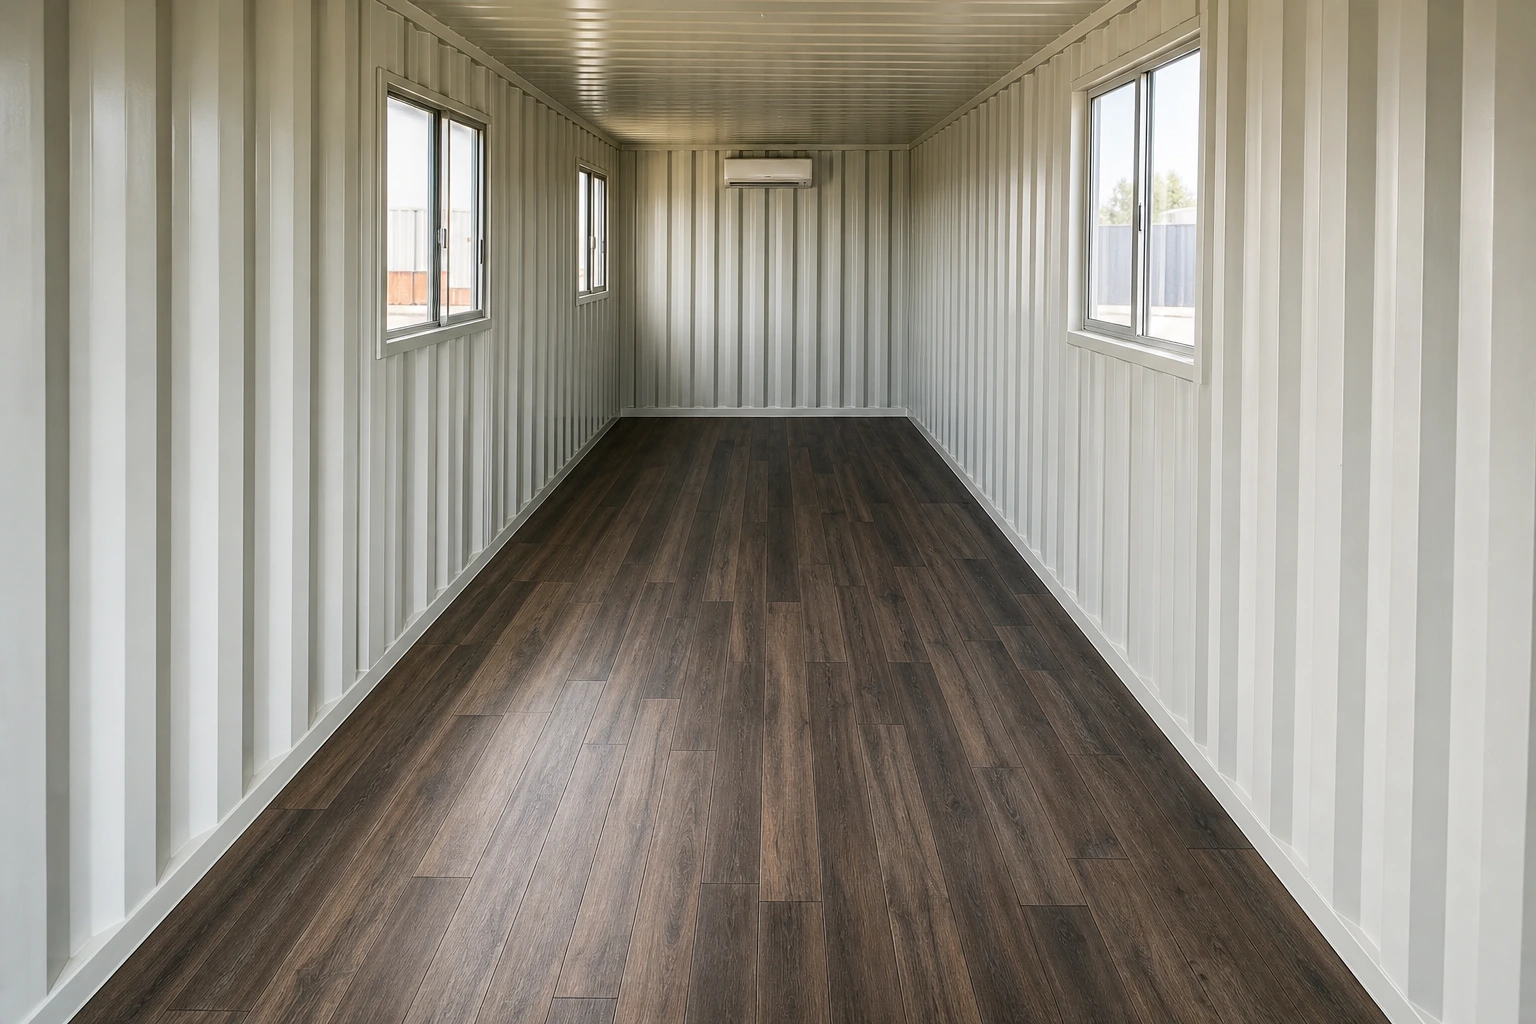
Vinyl flooring is a practical choice for a shipping container home. It is available in many styles, can be relatively easy to install, and works well in compact spaces. But a successful floor depends on much more than clicking boards together.
Why vinyl works well in a shipping container home
Shipping container homes have narrow interiors, steel shells, and unique moisture and temperature concerns. Vinyl plank flooring can be a good match because it offers:
- A finished wood or stone appearance without the same cost
- Relatively simple installation
- Easy everyday cleaning
- Better moisture resistance than many wood-based floors
- A low-profile finish that preserves interior height
- Replaceable planks if part of the floor becomes damaged
Not all vinyl flooring is the same. Some products are fully waterproof, while others contain layers that may still be affected by moisture. Some include an attached pad, and others require a separate underlayment. The product instructions should determine how the floor is prepared and installed.
The first lesson: start on the finished side
Shelby began laying the floor near a wall where the window framing had not been completed. Once the boards were in place, she realized that unfinished work in that area would make the installation more difficult.
This is an easy mistake to make when trying to keep a container conversion moving. Flooring creates visible progress, but installing it too early can put it in the path of cutting, welding, framing, painting, and heavy foot traffic.
Before opening the first box of flooring, complete as much of the following work as possible:
- Window and door framing
- Welding and grinding
- Insulation and air sealing
- Plumbing and electrical rough-ins
- Wall and ceiling installation
- Drywall finishing and sanding
- Interior painting
- Exterior leak repairs
- Subfloor patching and leveling
If unfinished work must continue, begin flooring at the most complete and stable wall. Avoid starting from an edge that may still move, be rebuilt, or require new framing.
The second lesson: confirm the flooring and underlayment work together
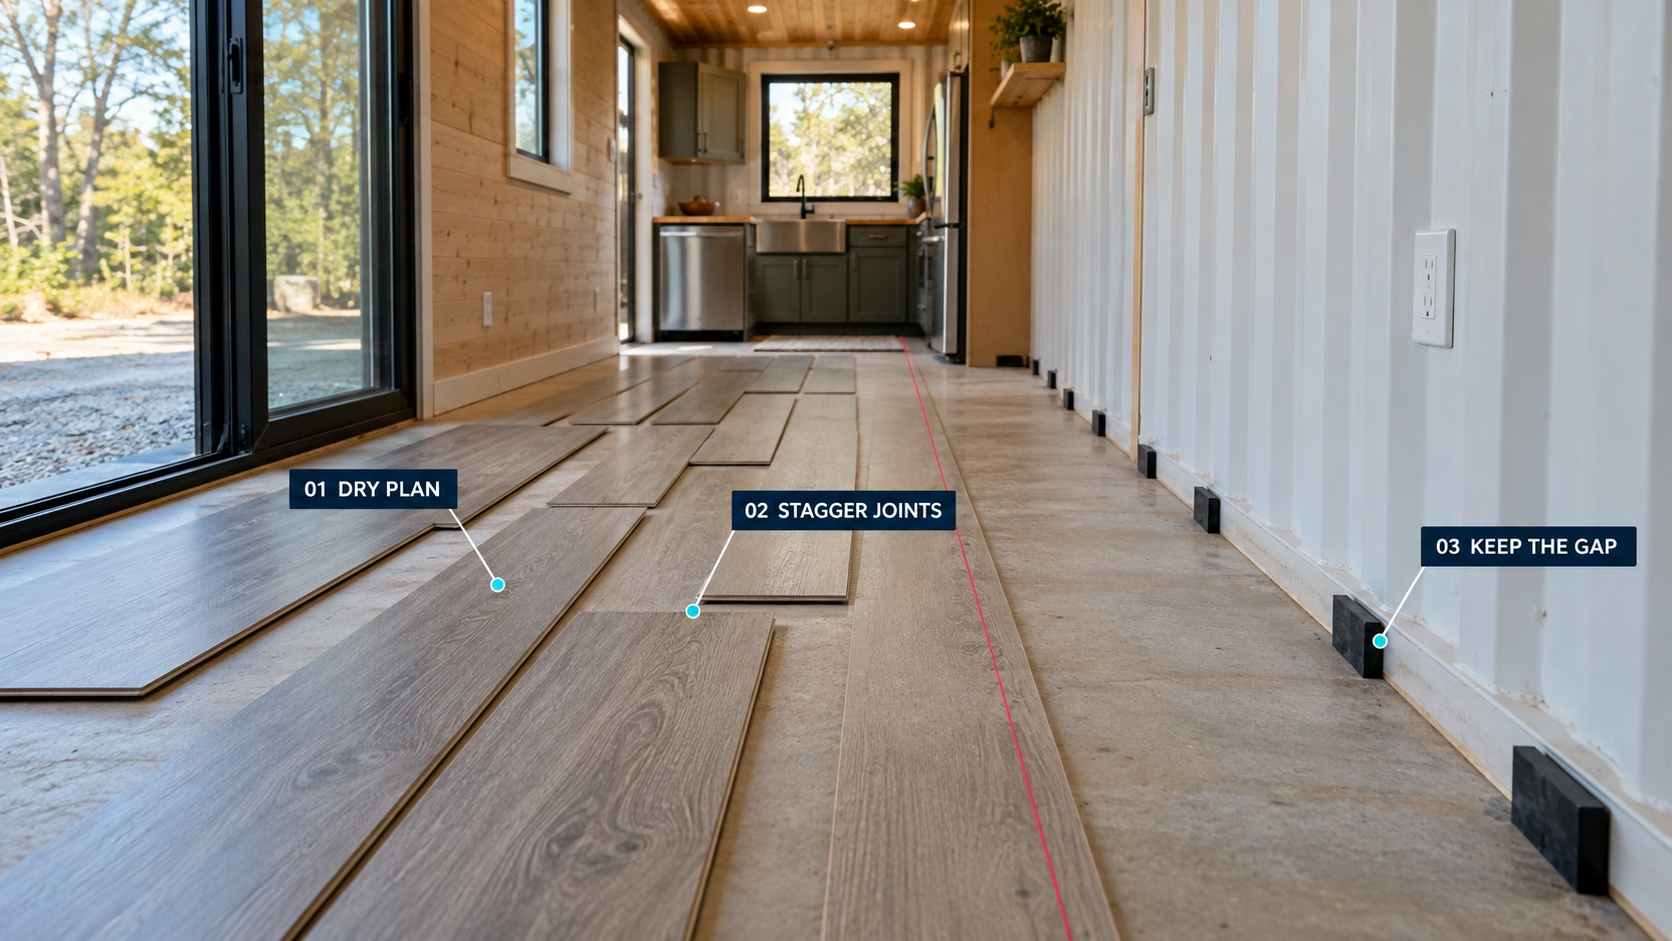
After starting the installation, Shelby concluded that the original flooring was not ideal. The underlayment also failed to perform as expected, so they removed the new floor and replaced the underlayment before trying again.
Losing a day is frustrating, but removing an unsuitable assembly before completing the entire room can prevent a much larger problem later.
Before installation, check:
- Whether the flooring has attached padding
- Whether a separate underlayment is permitted or required
- Which underlayment materials are approved
- The maximum allowable underlayment thickness
- Whether a vapor retarder is required
- Whether the product is approved for the expected temperature range
- Whether it can be installed over the existing subfloor
- The required flatness tolerance
- The required perimeter expansion space
Adding extra underlayment does not automatically create a better floor. If the assembly is too soft or thick, the locking joints may flex, separate, or break. Always follow the flooring manufacturer’s written instructions.
Inspect the original container floor
Many shipping containers arrive with a thick plywood floor supported by steel crossmembers. Before covering it, determine whether it is suitable for residential use and for the selected flooring system.
Inspect the floor for:
- Water damage
- Soft or delaminated plywood
- Oil, chemical, or unknown stains
- Strong or unusual odors
- Raised fasteners
- Deep gouges and damaged patches
- High seams or uneven transitions
- Evidence of pests or mold
- Gaps around walls and penetrations
Used container floors may have an uncertain cargo history or may contain factory-applied treatments. If the history and condition are unknown, consult appropriate environmental and building professionals before sanding, cutting, encapsulating, or covering the floor.
Make the subfloor flat, clean, and dry
Floating vinyl flooring needs a stable surface. A container floor does not have to look perfect, but it must meet the flooring manufacturer’s flatness requirements.
Use a long straightedge or level to locate high and low areas. Repair damaged sections and smooth abrupt edges with methods compatible with the existing plywood and the new floor.
Before installing the underlayment:
- Remove construction debris and loose fasteners.
- Vacuum the floor thoroughly.
- Correct squeaks or movement in the subfloor.
- Repair soft or damaged plywood.
- Flatten high seams and fill approved low areas.
- Confirm that the surface is dry.
- Seal unwanted gaps and pest-entry points.
Small debris left under vinyl can create visible bumps or pressure points. Spend the extra time cleaning before the floor is covered.
Control moisture and condensation
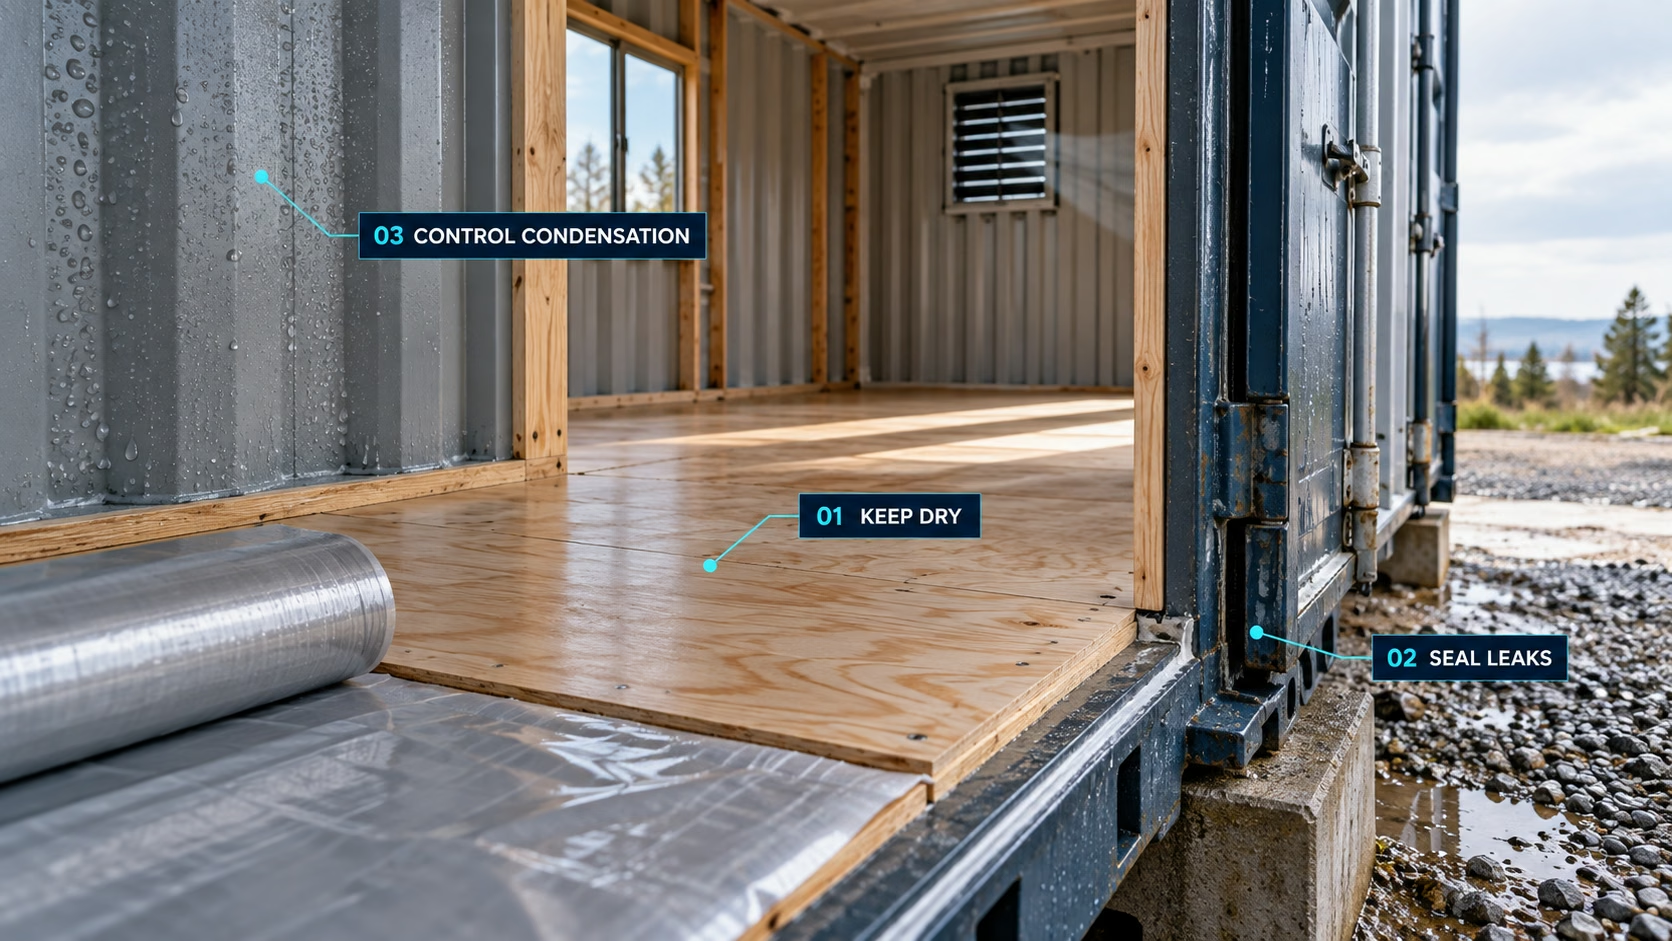
The steel shell of a shipping container can change temperature quickly. Warm, humid air that reaches a cooler steel surface may condense into water. Moisture can also enter through exterior leaks, poorly sealed openings, or the ground below the container.
Flooring should not be installed until the container is watertight and the interior moisture conditions are under control.
Evaluate:
- Roof and wall leaks
- Door and window flashing
- Condensation on steel surfaces
- Drainage around the foundation
- Ventilation and air-conditioning plans
- Insulation around the floor perimeter
- The need for a manufacturer-approved vapor retarder
A waterproof plank does not make the whole floor assembly waterproof. Moisture trapped beneath it can still contribute to odor, mold, adhesive failure, or damage to the underlying plywood.
Plan the layout before laying boards
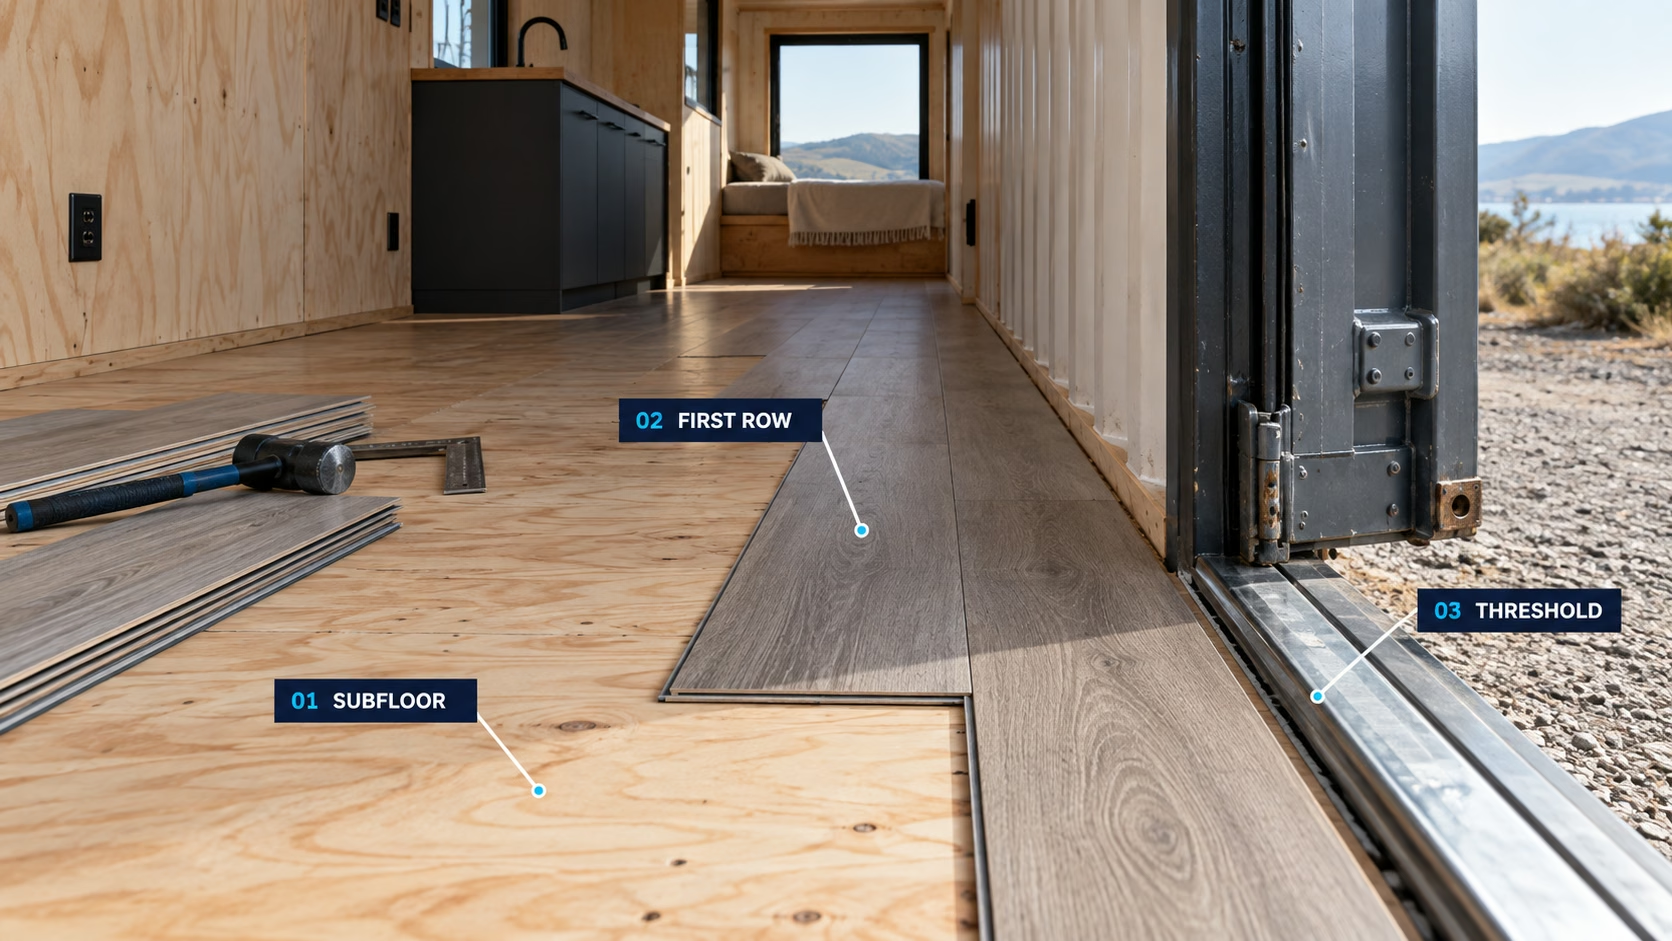
A shipping container is long and narrow, so the direction and width of the planks can strongly affect the finished appearance.
Dry-plan the first several rows before installation. Measure the room at multiple points because container walls and new framing may not be perfectly parallel.
A good layout should:
- Avoid an extremely narrow final row
- Keep the first row straight
- Stagger end joints according to the manufacturer
- Place cut edges where trim will cover them
- Flow cleanly through doors and between connected containers
- Account for cabinets, walls, and future openings
If the calculated last row will be too narrow, trim the first row so the two edges feel more balanced. A slightly smaller first row is usually less noticeable than a thin strip at the opposite wall.
Acclimate the flooring when required
Some vinyl products require acclimation, while others do not. Follow the instructions for the exact product rather than using a universal rule.
The container should generally be brought to the temperature and humidity conditions expected during normal occupancy. Flooring installed inside an extremely hot, cold, or uncontrolled container may expand or contract after the HVAC system begins operating.
Store the cartons flat and protect them from direct sunlight, moisture, and extreme temperatures. Mix planks from multiple cartons during installation if the manufacturer recommends it, which can produce a more natural variation in pattern and color.
Install the correct underlayment
If a separate underlayment is approved, lay it according to the flooring and underlayment instructions. Keep it flat without wrinkles, overlaps, or raised seams unless the product specifically requires them.
Depending on the selected system, seams may need to be butted together and taped with an approved tape. Turned-up edges may also need to be trimmed after the flooring is installed.
Do not substitute leftover foam, general construction plastic, or an unapproved padding layer. Underlayment affects joint movement, sound, moisture, and warranty coverage.
Establish a straight first row
The first row controls the alignment of the entire floor. Do not use the container wall as the only guide, since the corrugated steel or interior framing may not be perfectly straight.
Snap a reference line or measure from a reliable finished surface. Use spacers to maintain the expansion gap required by the flooring manufacturer.
As you install:
- Orient the tongue-and-groove edges as directed.
- Connect each plank without forcing the locking joint.
- Use the approved tapping block or pull bar when needed.
- Stagger end joints by the required minimum distance.
- Check alignment every few rows.
- Remove debris from each joint before closing it.
If a joint does not close cleanly, stop and inspect it. Forcing damaged or misaligned boards together can create gaps farther down the room.
Cut around doors and wall framing carefully
Door jambs and thresholds often create the most complicated flooring cuts. Whenever possible, undercut compatible wood trim so the flooring can slide beneath it while maintaining the required expansion space.
Do not trap a floating floor beneath tightly fastened door frames, cabinets, wall plates, or permanent fixtures. The floor needs room to move as temperatures change.
At exterior doors, confirm that the finished floor height will not interfere with:
- Door operation
- Threshold drainage
- Weather seals
- Required clearances
- Accessible transitions
Use the flooring manufacturer’s approved transition profile at doorways and wherever the installation changes materials or exceeds the allowable continuous run.
Protect the finished floor during the remaining work
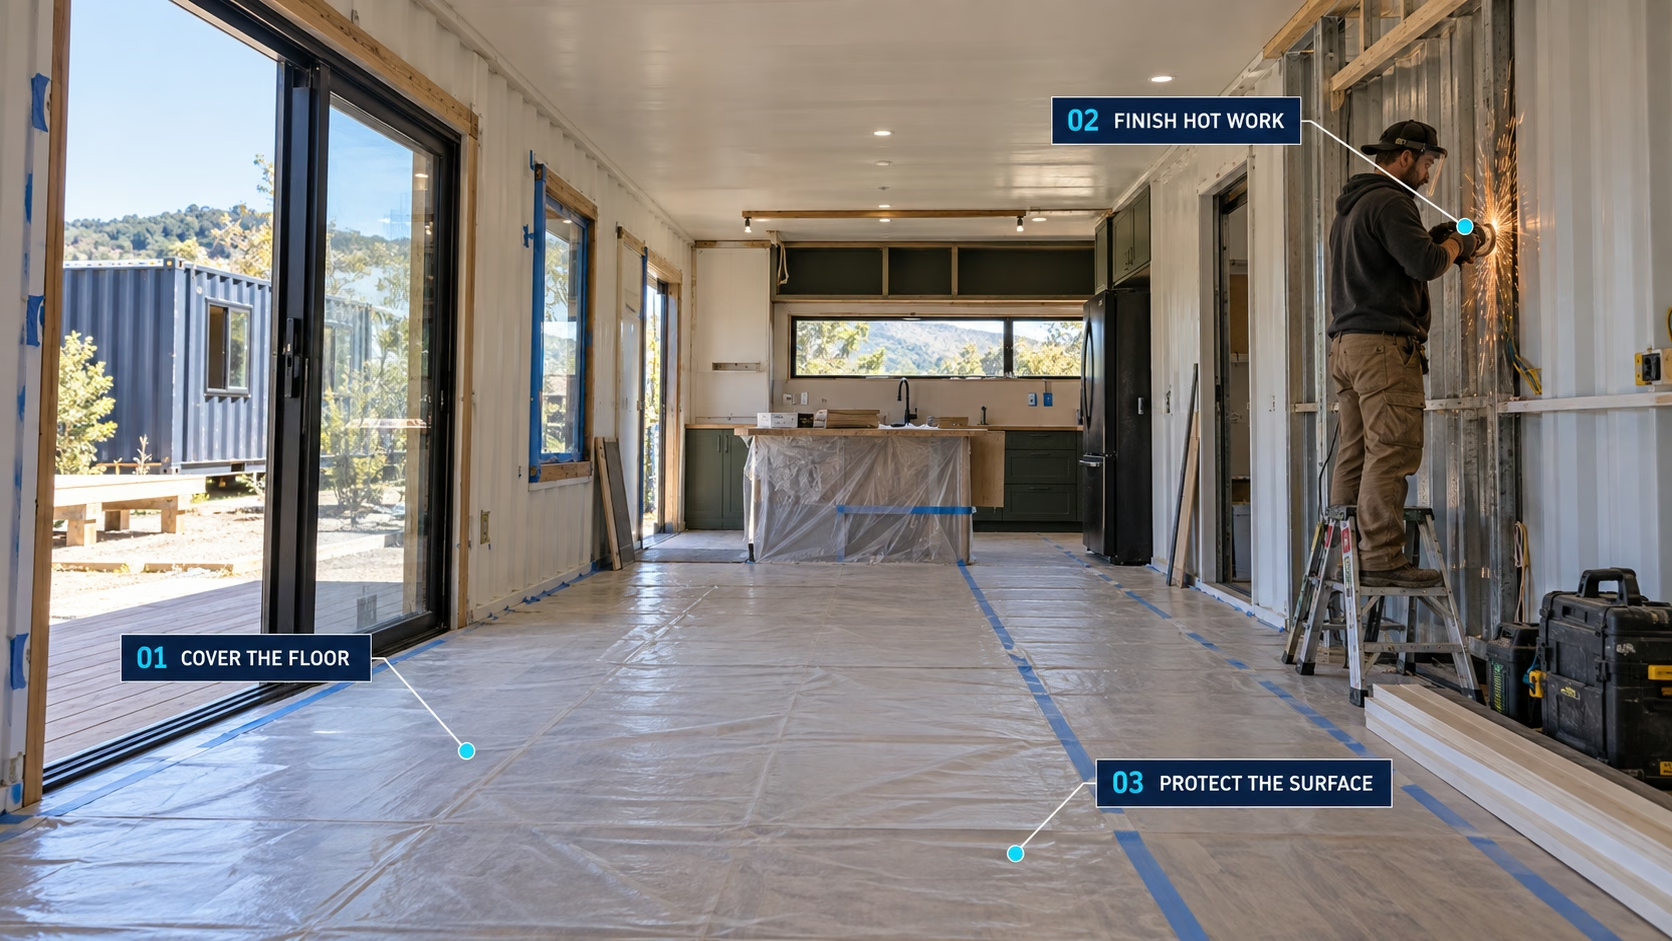
Shelby were still framing a window and continuing other major work on the container. That is a strong reason to delay the final flooring or protect it carefully.
Grinding sparks, metal shavings, dropped tools, paint, adhesives, and construction traffic can permanently damage vinyl. If the floor must be installed before the project is finished, cover it with a breathable protection system approved by the flooring manufacturer.
Avoid taping directly to the finished planks unless the tape is specifically approved. Some adhesives can discolor or damage the wear layer.
Stop and restart when something is wrong
One of the most useful parts of Shelby project is that they did not continue simply because the first section was already installed. They recognized that the flooring and underlayment were not working, removed them, and started again.
Pause the installation if you notice:
- Boards separating after they are locked
- Excessive bounce or softness
- Raised joints
- Repeated alignment problems
- Moisture beneath the underlayment
- A first row that is drifting out of square
- Damaged locking edges
- A floor that sounds or feels different from the product specifications
It is easier to correct five rows than an entire container.
Coordinate flooring with the complete container-home plan
The video also follows the arrival of additional containers and preparation for a stacked section of the home. The family plans to connect the containers in a T-shaped layout, creating a larger open living area.
That broader construction work affects the flooring. New container connections, wall cutouts, structural reinforcement, and footings should be completed before a continuous finish floor spans the affected areas.
Stacked or connected containers require engineered supports and foundations designed for the final loads and site conditions. In the video, the team planned deeper concrete footings for the stacked containers rather than relying on the slab supports used elsewhere.
Flooring should be one of the later finishes, after the containers are permanently placed, connected, weatherproofed, and structurally complete.
A better sequence for installing container-home flooring
The exact construction sequence will vary, but a practical order is:
- Complete the foundation and permanently place the container.
- Make engineered structural cuts and install reinforcement.
- Finish windows, exterior doors, roofing, and weather sealing.
- Complete insulation and major mechanical rough-ins.
- Finish dusty or spark-producing work.
- Inspect, repair, flatten, clean, and dry the subfloor.
- Confirm the flooring and underlayment specifications.
- Acclimate materials if required.
- Plan the plank layout and expansion spaces.
- Install the underlayment and flooring.
- Add trim and approved transitions without pinning the floor.
- Protect the completed surface until construction ends.
This order reduces rework and protects the finish from unnecessary damage.
Learn from the first attempt
Vinyl flooring can be a manageable DIY project, especially within the straightforward footprint of a shipping container. The narrow room does not eliminate the need for careful planning, though. Product compatibility, subfloor preparation, moisture control, layout, and construction sequencing will determine how the finished floor performs.
Shelby’s experience is a useful reminder that restarting is sometimes the right decision. Discovering an unsuitable floor or underlayment early costs a day. Ignoring it may cost the entire installation.
Watch Shelby’s work through the process in Vinyl Floor Install in the SHIPPING CONTAINER HOME.
Need shipping containers for your building project?
Quality Containers can help you select the right shipping containers for storage, construction, or a custom conversion. Contact our team to discuss available sizes, container conditions, delivery, and modification options for your project.
Safety note: Shipping container construction can involve structural modification, treated or contaminated materials, electrical work, heavy equipment, and moisture risks. This article is educational and does not replace engineered plans, local permits, product instructions, environmental evaluation, or qualified tradespeople.