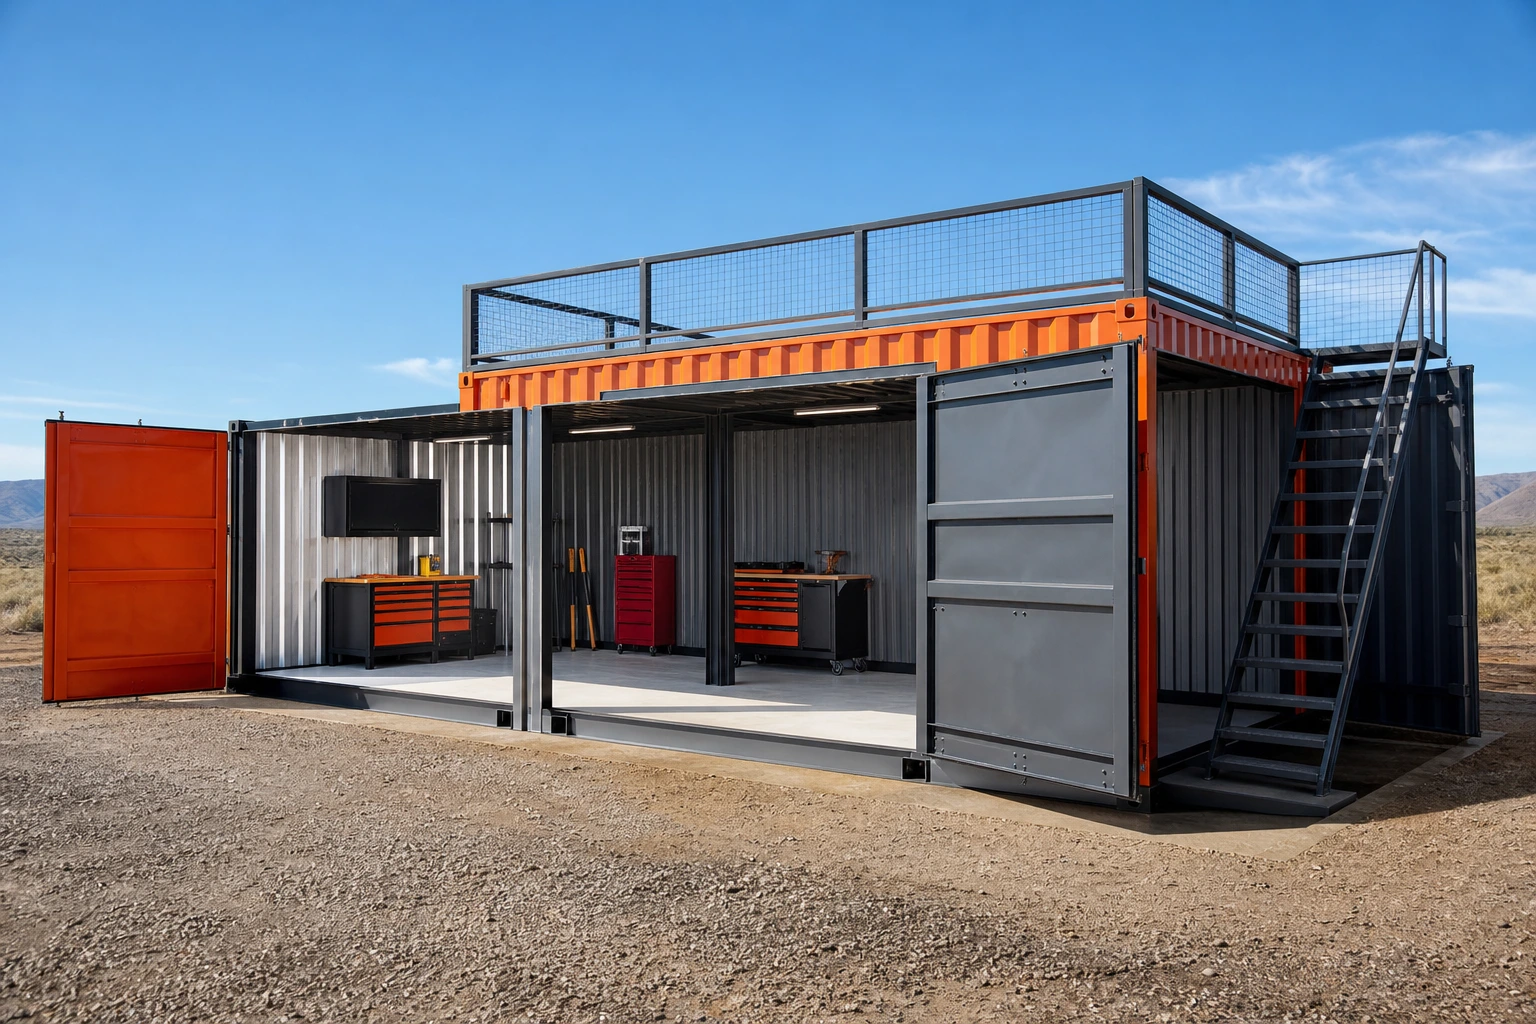
A shipping container can hold an enormous amount of equipment, but without a plan it can quickly become a long steel tunnel filled with tools you cannot reach. The best container workshops use the floor, walls, doors, and even exterior areas deliberately.
Here is how to apply those ideas to your own container.
1. Start with a flat, stable site
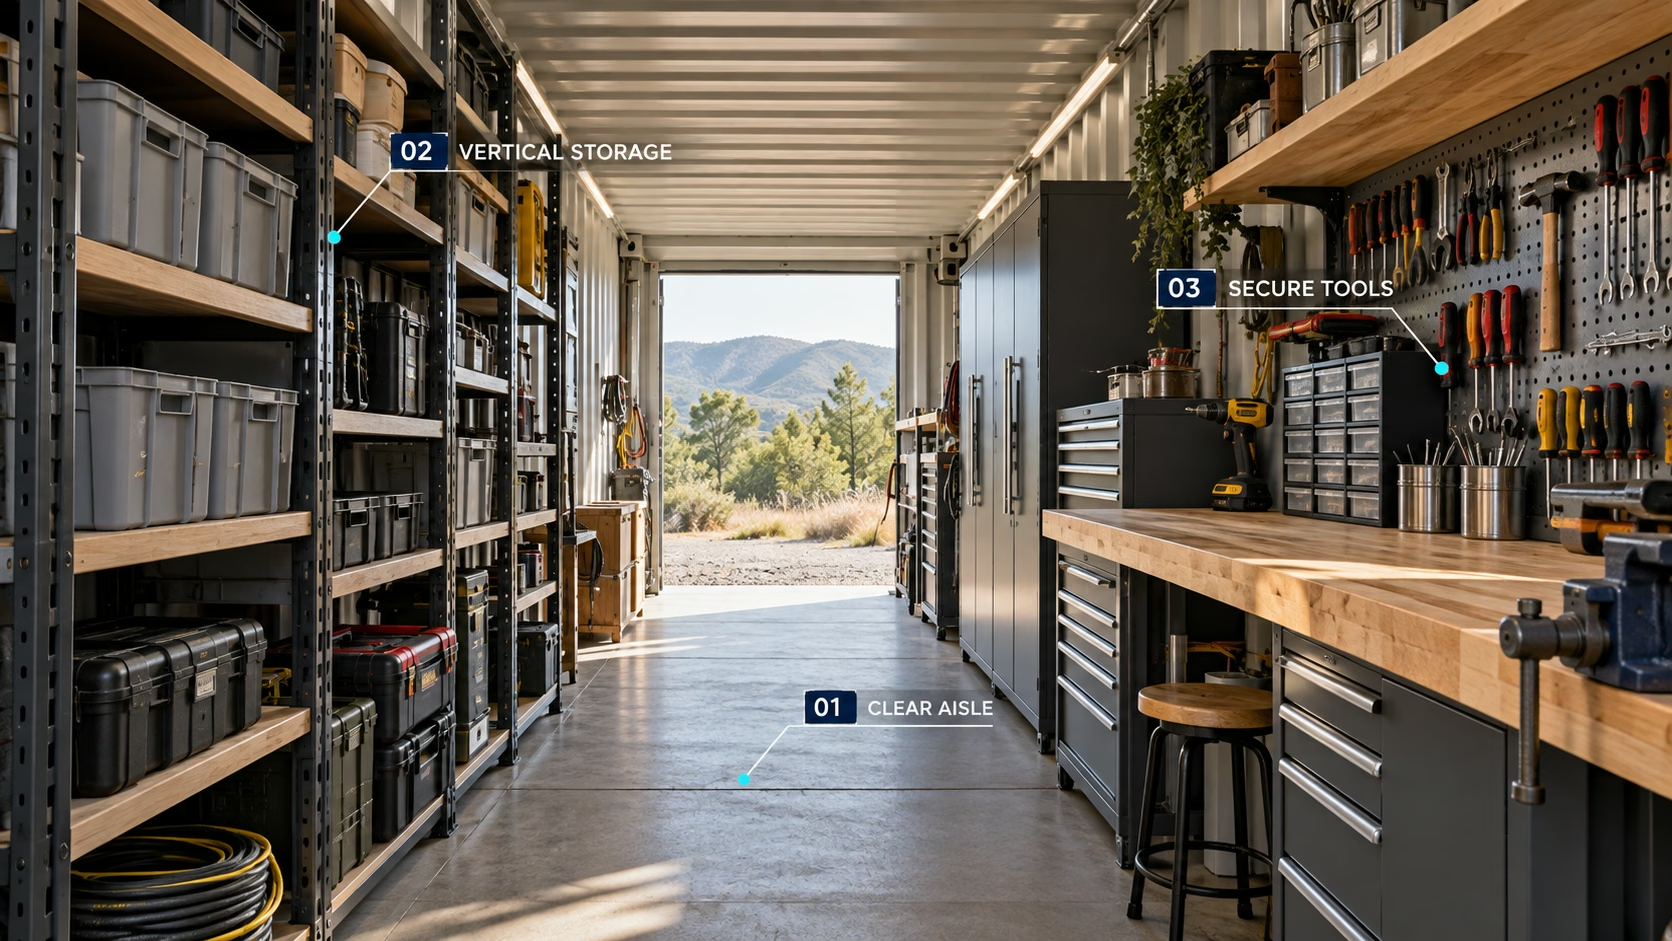
Matt’s first rule is simple: flat ground is good, and a slope creates more work.
A container needs stable, properly supported bearing points. If the site is uneven, the container may twist enough to make the cargo doors difficult to open and close. Poor drainage can also leave the underside exposed to standing water and corrosion.
On Matt’s sloped site, he created small concrete footings that followed the general grade. After positioning the container, he used appropriate blocking above the footings to bring the container level.
The correct foundation depends on the container, soil, climate, loads, and intended use. Options may include:
- Compacted gravel pads
- Concrete piers or footings
- Grade beams
- Engineered slabs
- Approved precast supports
Support is generally concentrated at structurally appropriate points, especially the corners. Avoid placing random blocks under thin portions of the floor or side rails. For permanent installations, stacked containers, workshops with heavy equipment, or sites exposed to high winds, have the foundation and anchoring designed by a qualified professional.
2. Protect the lock with a lockbox
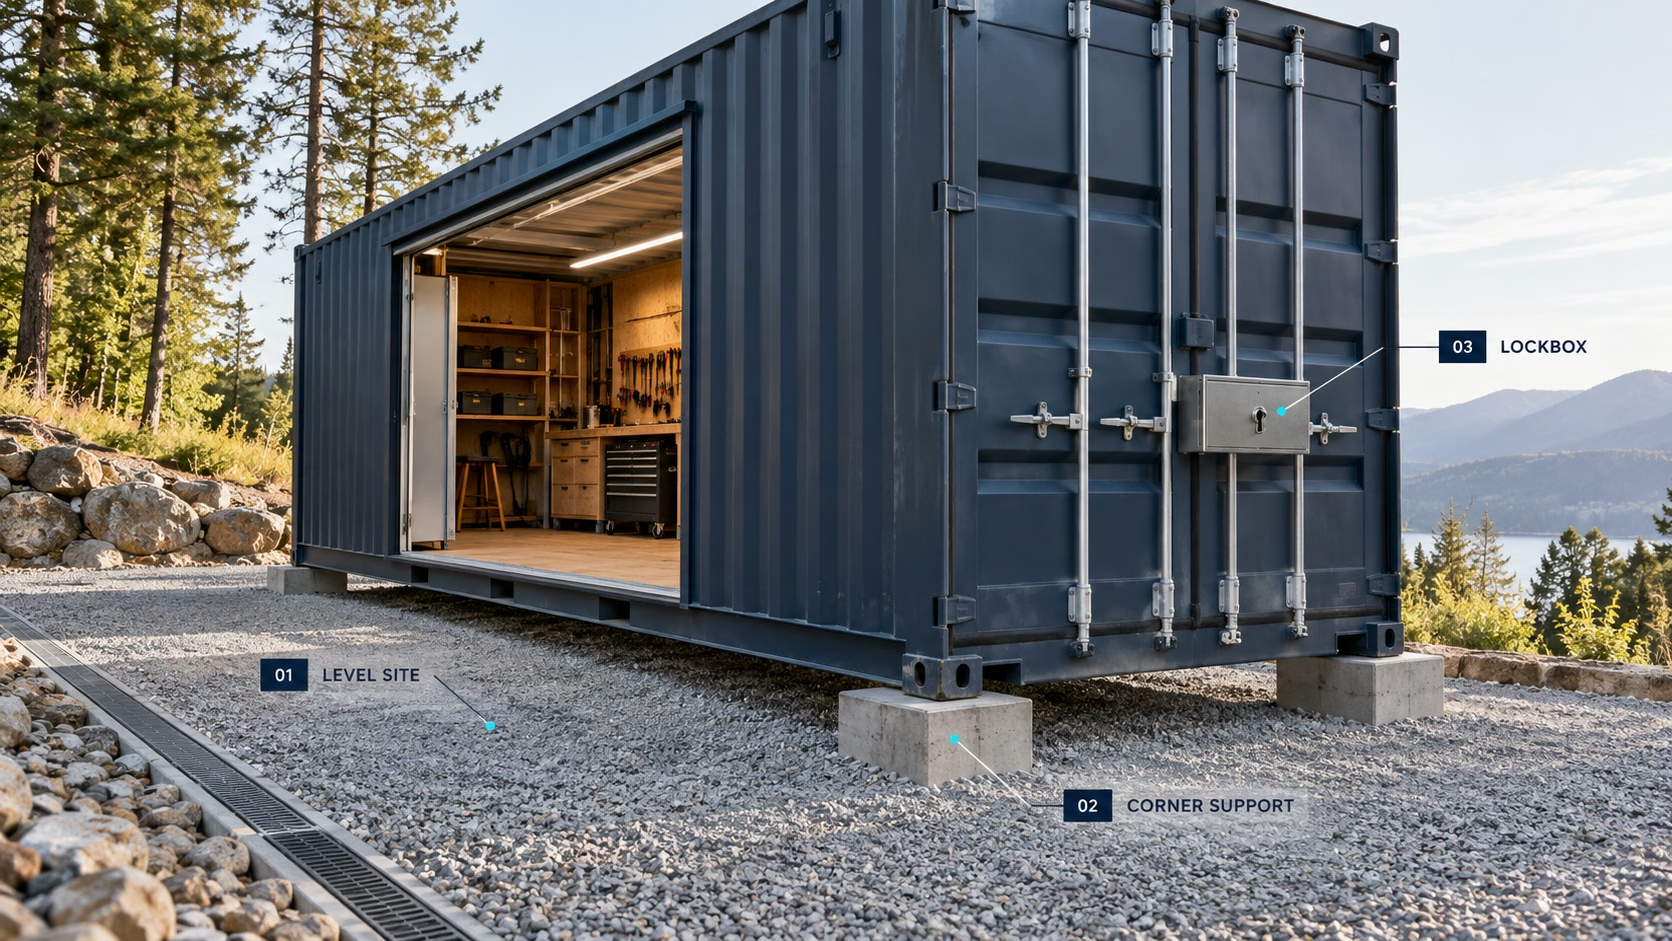
A standard padlock can be vulnerable when its shackle is exposed. A steel lockbox, also called a lock guard or lock shroud, surrounds the lock and makes it harder to reach with bolt cutters and other tools.
Lockboxes can be purchased as container accessories or fabricated and welded into place. Use a high-quality lock that fits the enclosure correctly. A lockbox that is too small, poorly aligned, or difficult to operate may encourage users to leave the container unsecured.
Matt also uses a trail or game camera aimed at the container. Layered security is more effective than depending on one lock. Depending on the site, consider:
- Motion-activated lighting
- Visible or discreet cameras
- Door-contact sensors
- Cellular alarms
- Perimeter fencing
- An inventory of valuable tools
- Marked or registered equipment
Install cameras only where their view respects applicable privacy laws and neighboring properties.
3. Use the space outside the container
Container storage does not have to stop at the interior walls. Matt encourages owners to think about the roof and sides as potential work or storage zones.
A side-mounted workbench, material rack, shade structure, or tool station can expand a narrow workshop without occupying the center aisle. Exterior storage may work well for weather-resistant materials that are used frequently.
The roof should be treated cautiously. Containers are designed to carry stacking loads primarily through their corner posts, not unlimited weight spread across the thin roof panel. Do not place heavy materials, equipment, soil, water tanks, or occupied platforms on top without an engineered support system.
Exterior additions should also avoid trapping water or damaging the protective coating. Use attachment details that account for corrosion, wind, and drainage.
4. Keep a rubber mallet near the doors
Cargo doors can become stiff because of misalignment, dirt, corrosion, worn hardware, or pressure on the container frame. Matt noticed that workers at a container yard carried a rubber mallet to help operate stubborn door mechanisms.
A mallet can provide controlled persuasion without the damage caused by a steel hammer. Store it near the entrance so it is available before you climb into the container.
Do not use force to hide an underlying problem. If the doors repeatedly bind:
- Check whether the container is level
- Clean and lubricate hinges and locking bars
- Inspect the door gaskets
- Look for bent hardware
- Confirm that the frame has not twisted
- Repair severe corrosion or damage
Never place fingers near hinges, locking cams, or pinch points while someone is operating the door.
5. Mark the position of equipment ramps
If wheeled equipment enters the container on portable ramps, mark the exact ramp locations at the threshold. This saves time and helps keep both ramps aligned with the equipment’s tires.
Use durable paint, tape, or metal marks that remain visible in low light. The ramps must be rated for the equipment and secured against slipping. Their slope should be manageable, and the transition at the container threshold should not catch small wheels.
Marking the tracks is especially useful for:
- Lawn tractors
- Motorcycles
- Tool chests
- Generators
- Compact construction equipment
- Carts and dollies
Keep the ramp storage location close to the doors but outside the main path.
6. Store upward and deep
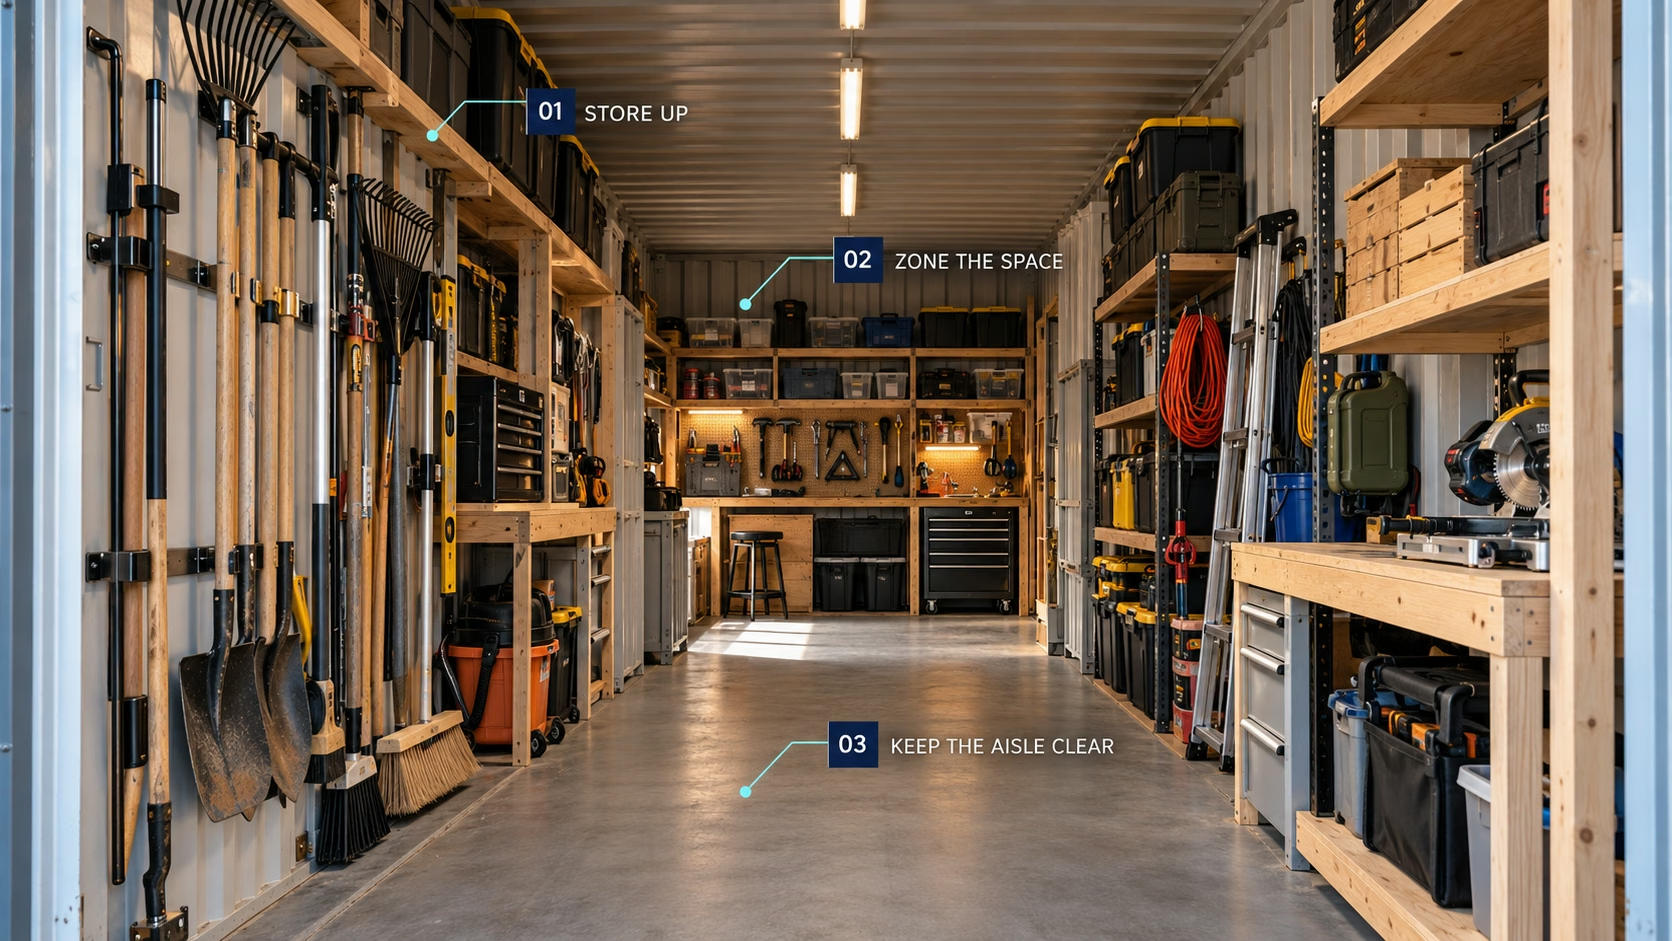
The central idea behind Matt’s system is to get equipment off the floor and use the full height and depth of the container.
An open center aisle makes every other part of the workshop more useful. Long-handled tools can hang vertically. Shelves can hold containers and parts. Rarely used items can occupy higher or deeper positions.
Matt welds simple steel angles and supports to the container, but welding is not the only option. Container-accessory suppliers offer shelving brackets that hook into existing upper lashing points. Owners can also build freestanding shelving systems that do not modify the shell.
Before adding storage, consider:
- Shelf load ratings
- How the system is anchored
- Whether stored items could fall during transport
- Clearance for doors and locking rods
- Access to vents and electrical equipment
- Corrosion protection at welded areas
- The container’s future resale or relocation
Do not weld to a container that contains flammable materials or an unknown residue. Hot work should be performed by qualified people using proper fire-prevention procedures.
7. Organize by frequency of use
A container’s depth can work against you. If frequently used tools are stored at the rear, every quick task becomes a walk through a hot, crowded space.
Matt stores rarely used items toward the back or high on the walls. The most frequently used equipment stays near the front, especially on the right side, so he can retrieve it by opening only one cargo door.
A simple zoning system might look like this:
- Front zone: daily tools, safety equipment, ramps, and supplies
- Middle zone: weekly project tools and active materials
- Rear zone: seasonal equipment, archives, and spare parts
- High shelves: light, rarely used items
- Low shelves: dense or heavy materials
Keep emergency supplies, fire extinguishers, and first-aid equipment visible and accessible near the entrance.
8. Plan water, electricity, and sanitation
A working container needs basic services just like any other workshop. Matt recommends planning for trash, drinking water, possible rainwater collection, and electrical needs.
Before adding utilities, think about how the container will actually be used:
- Will battery tools need charging?
- Is permanent lighting required?
- Will the space use fans or ventilation equipment?
- Is drinking or hand-washing water needed?
- Where will trash, oily rags, and hazardous waste go?
- Is rainwater collection legal and useful at the site?
Permanent wiring should be designed and installed according to local electrical codes. Steel walls create additional grounding, abrasion, and penetration concerns. Extension cords should not become a substitute for permanent wiring.
Collected rainwater may be suitable for certain nonpotable uses, but it should not be treated as drinking water without an appropriate collection, filtration, disinfection, and testing system.
9. Keep it 96% useful and 4% personal
An organized workshop can still have character. Matt reserves a small portion of the container for flags, unusual objects, broken tools turned into decoration, and references that make the space feel like his own.
The exact percentage is less important than the principle. A workspace should support the person using it. A few personal details can make a purely utilitarian steel box feel like a place where you want to build things.
Keep decoration away from electrical panels, hot-work areas, heaters, fire extinguishers, and exits.
10. Lay spray cans down
Matt stores spray-paint cans horizontally so they fit efficiently on shallow shelves. His one requirement is discipline about keeping the caps.
Before copying this approach, read the product label and safety data. Aerosol products should be stored within their specified temperature range, away from ignition sources and direct sunlight. A closed shipping container can become dangerously hot, so flammable or pressurized products may require an approved cabinet or another storage location.
Keep caps installed, labels visible, and damaged or leaking cans out of the container.
11. Give every tool a visible outline
The familiar rule “don’t put it down, put it away” becomes easier when every tool has a designated location.
Outlines, labels, or tool silhouettes make empty spots immediately visible. Users can see what is missing and know exactly where to return it.
This works especially well for:
- Hand tools
- Welding accessories
- Garden tools
- Measuring equipment
- Safety gear
- Frequently used power tools
A designated home reduces searching and prevents flat surfaces from becoming piles.
12. Hang anything with a handle
If a tool has a handle, there is a good chance it can be stored on a hook. Hanging storage keeps items visible while freeing the floor and shelf space for equipment that cannot hang.
Shovels, rakes, brooms, extension cords, hoses, clamps, levels, and hand saws are all candidates. Position sharp or heavy items where they cannot fall into the aisle.
Use retainers for equipment that could swing or bounce during transport.
13. Use hooks and magnets
Steel walls make magnetic storage particularly useful. Magnetic trays, hooks, lights, labels, and tool holders can be repositioned without drilling or welding.
The weight rating of a magnet depends on the metal thickness, coating, surface condition, direction of force, and whether vibration is present. Do not assume a magnet’s advertised pull rating equals its safe wall-hanging capacity.
Hooks attached to shelving or lashing points add another flexible layer. Use mechanical retainers for anything heavy, sharp, expensive, or positioned overhead.
14. Build visible task kits
Matt groups related tools into kits, borrowing an organizational idea from filmmaker and artist Van Neistat. A plumbing kit, electrical kit, sharpening kit, or trailer-repair kit can be carried directly to a job.
He is cautious about drawers because hidden tools are easy to forget. His kits remain near the entrance with their labels facing outward.
Clear bins, open crates, or boldly labeled cases maintain visibility while keeping related tools together. Include a checklist inside each kit so missing items are noticed before the next job.
15. Practice “knolling” or orderly alignment
Matt also borrows from artist Tom Sachs by arranging related objects neatly at right angles. This practice is commonly called knolling.
Orderly alignment is not only visual. It makes inventory faster, shows gaps, and prevents small tools from disappearing beneath one another.
Use it for workbench layouts, fastener sorting, project preparation, or checking that a kit is complete before packing it away.
16. Paint small outdoor tools a bright color
Tools dropped in grass, soil, or brush can disappear even when they are only a few feet away. Matt paints easy-to-lose equipment with neon paint so it stands out.
Bright tape, heat-shrink tubing, or high-visibility tool dip can offer similar results without painting an entire tool. Avoid covering safety labels, moving components, electrical contacts, measurement markings, or areas that affect grip.
The goal is simple: make the tool look unnatural enough that it cannot hide in the landscape.
Do not ignore heat and ventilation
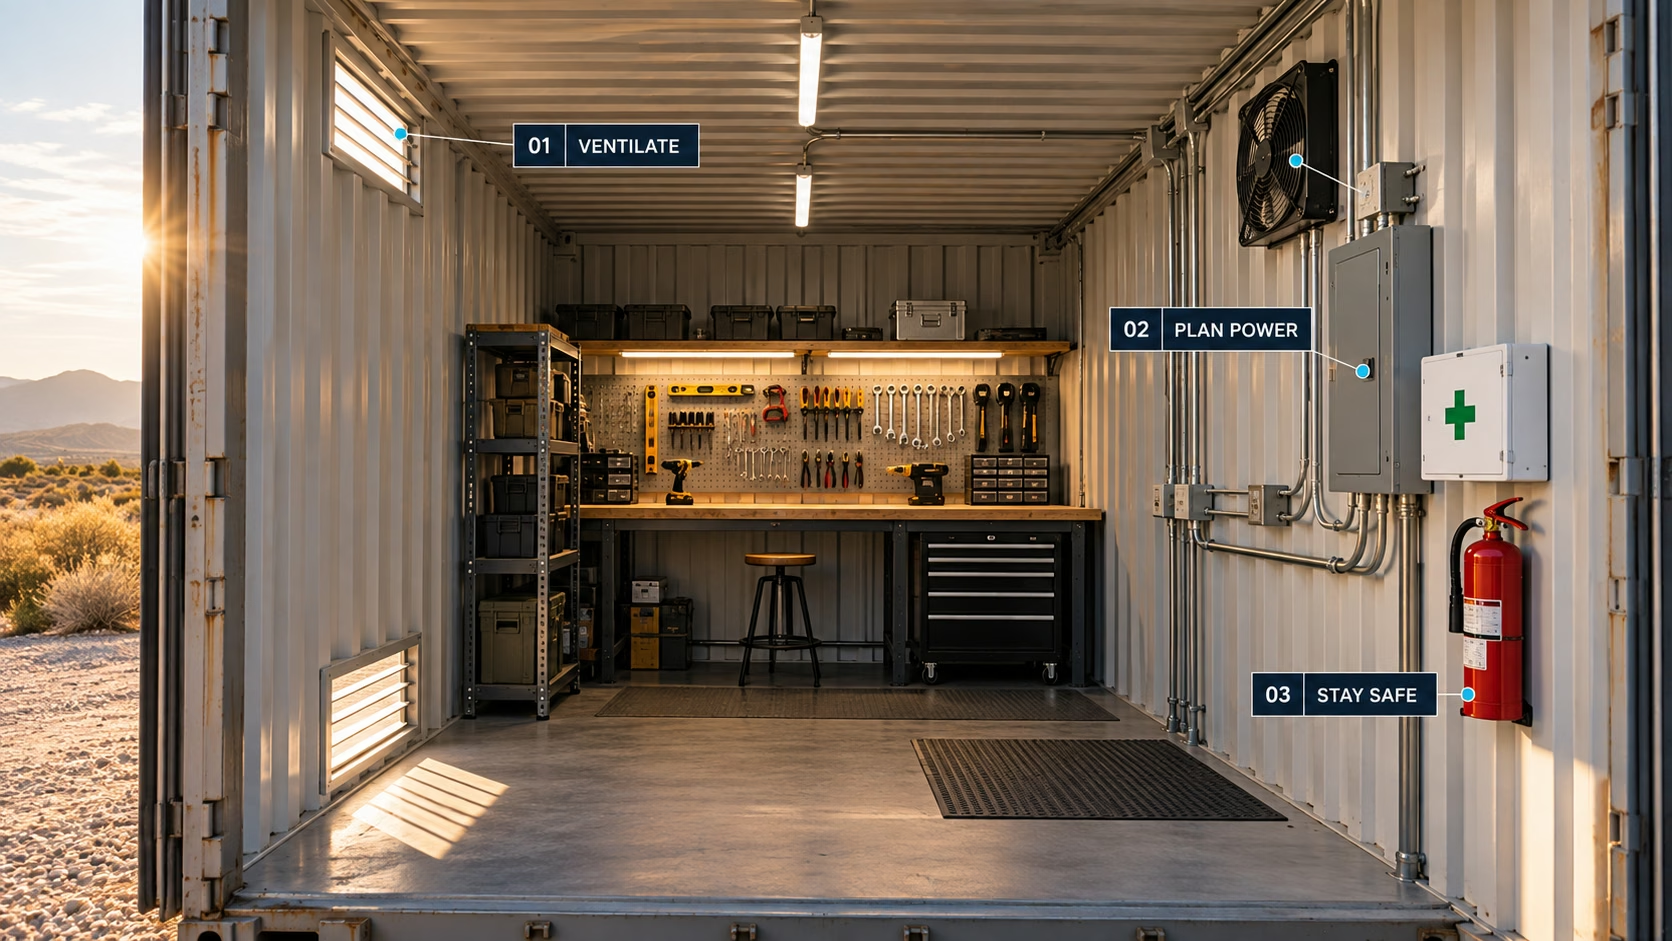
Shipping containers can become extremely hot in direct sun. Matt organizes the entrance so he can retrieve important tools quickly without spending unnecessary time inside during hot weather.
Organization helps, but it does not solve the heat problem. Depending on the climate and stored materials, consider:
- Passive high-and-low vents
- Powered exhaust fans
- A light-colored reflective roof coating
- A shade canopy with an air gap
- Insulation designed for the local climate
- A dehumidifier or conditioned system
- Temperature and humidity sensors
Ventilation openings should resist rain, insects, and unauthorized entry. Combustible, flammable, pressurized, temperature-sensitive, or battery-powered products may need specialized storage regardless of ventilation.
A practical container layout
Before installing shelves, sketch the interior and divide it into zones. Preserve a clear path from the doors to the rear and keep heavy objects low.
A useful layout includes:
- One wall for shallow, frequently used tools
- One wall for deeper shelving and project materials
- A clear center aisle
- A front loading and unloading zone
- A rear area for long-term storage
- Visible safety and utility stations near the entrance
Measure the widest equipment before selecting shelf depth. Deep shelves on both sides can make the aisle too narrow for carts, machinery, or safe movement.
Turn the container into a system
The art of container storage is not about fitting in the greatest possible number of objects. It is about making the objects you need easy to see, retrieve, use, and return.
Matt Crockett’s 16 rules combine big decisions, such as site preparation and security, with small habits, such as outlining tools and painting them bright colors. Together, they turn an empty steel box into a functional workshop.
Watch Matt’s complete tour in The Art of Shipping Container Storage.
Find the right storage container
Quality Containers can help you compare 20-foot, 40-foot, standard, high-cube, new, used, and specialty shipping containers for storage or workshop projects. Contact our team to discuss sizes, conditions, delivery requirements, and modification options.
Safety note: Container foundations, anchoring, shelving, welding, roof loads, electrical systems, ventilation, hazardous-material storage, and security modifications may require engineering, permits, licensed trades, or specialized equipment. Follow local requirements and product instructions.