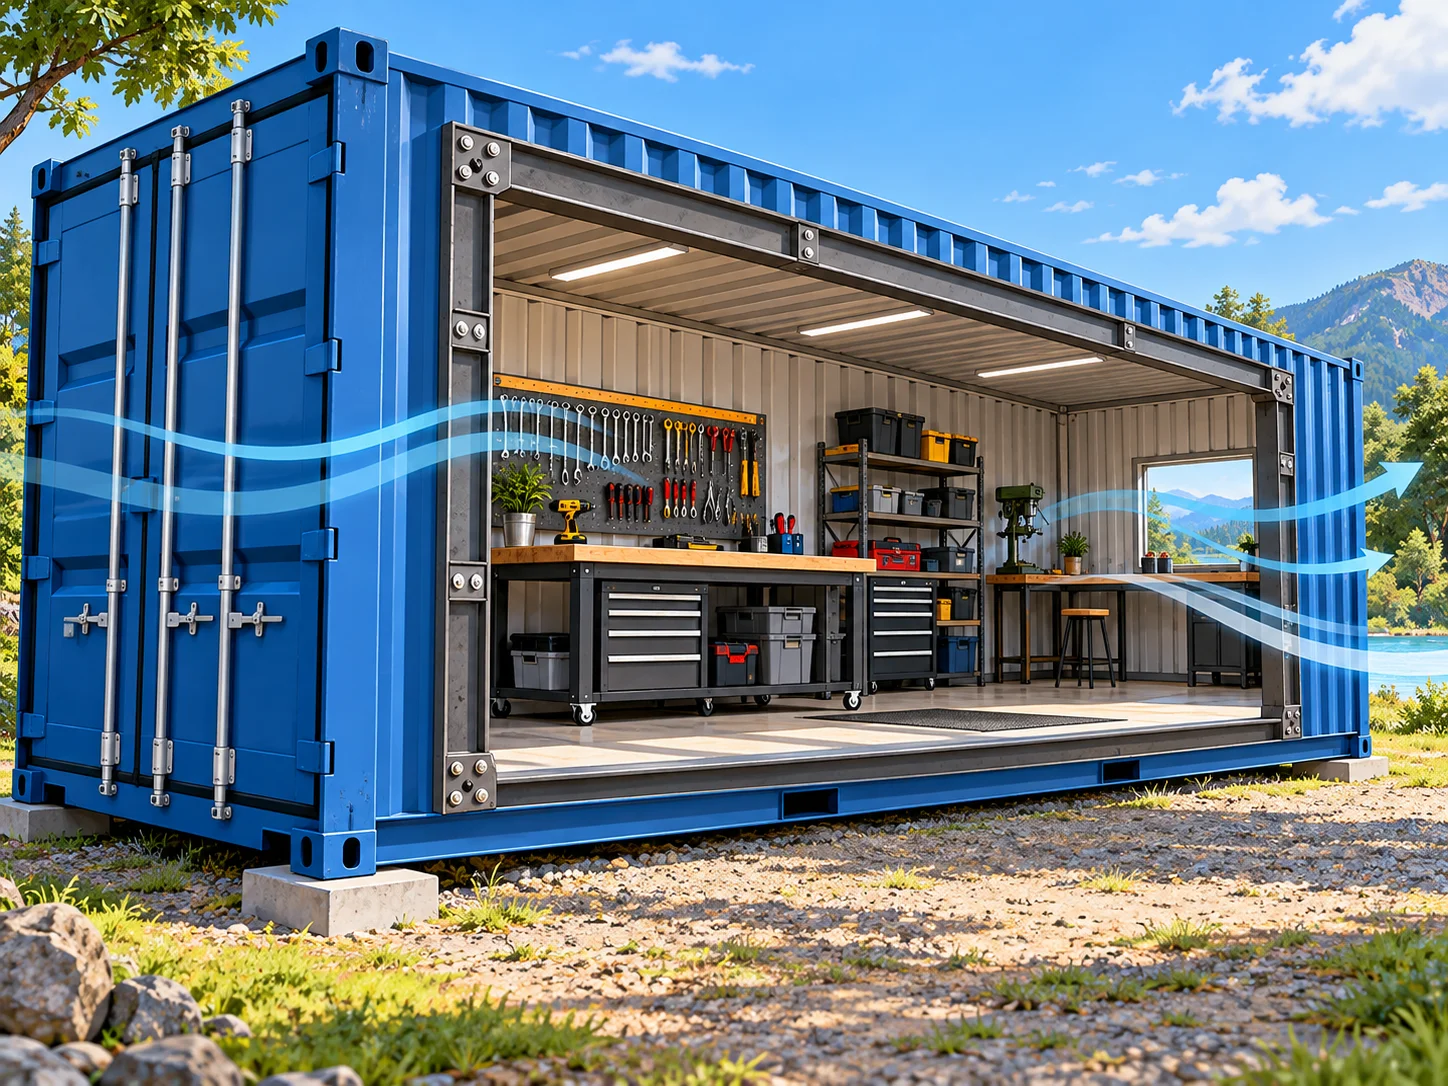
A shipping container can give us a dedicated place to build, repair and create without taking over the driveway or garage.
But turning a steel box into a comfortable workshop takes more than moving in a workbench. Heat, airflow, access and power all affect how useful the space will be.
In this project, we’re working with a 20-foot container and making one major modification: a side panel that lifts open to become an overhead canopy. Along the way, we tackle the frame, lifting hardware and details that make the opening usable.
Here are nine upgrades and planning decisions behind the conversion.
1. Start with a layout built around your work
Before modifying the container, we decide what we need the workshop to do.
This build is intended as a makerspace for fabrication, hands-on projects and filming. That means we need room for tools, materials and movement, along with useful camera angles.
A 20-foot container gives us a compact starting point, so every piece of equipment needs a place. We plan the work area around the projects we expect to tackle rather than filling the container with storage first.
2. Add a large opening for airflow and access
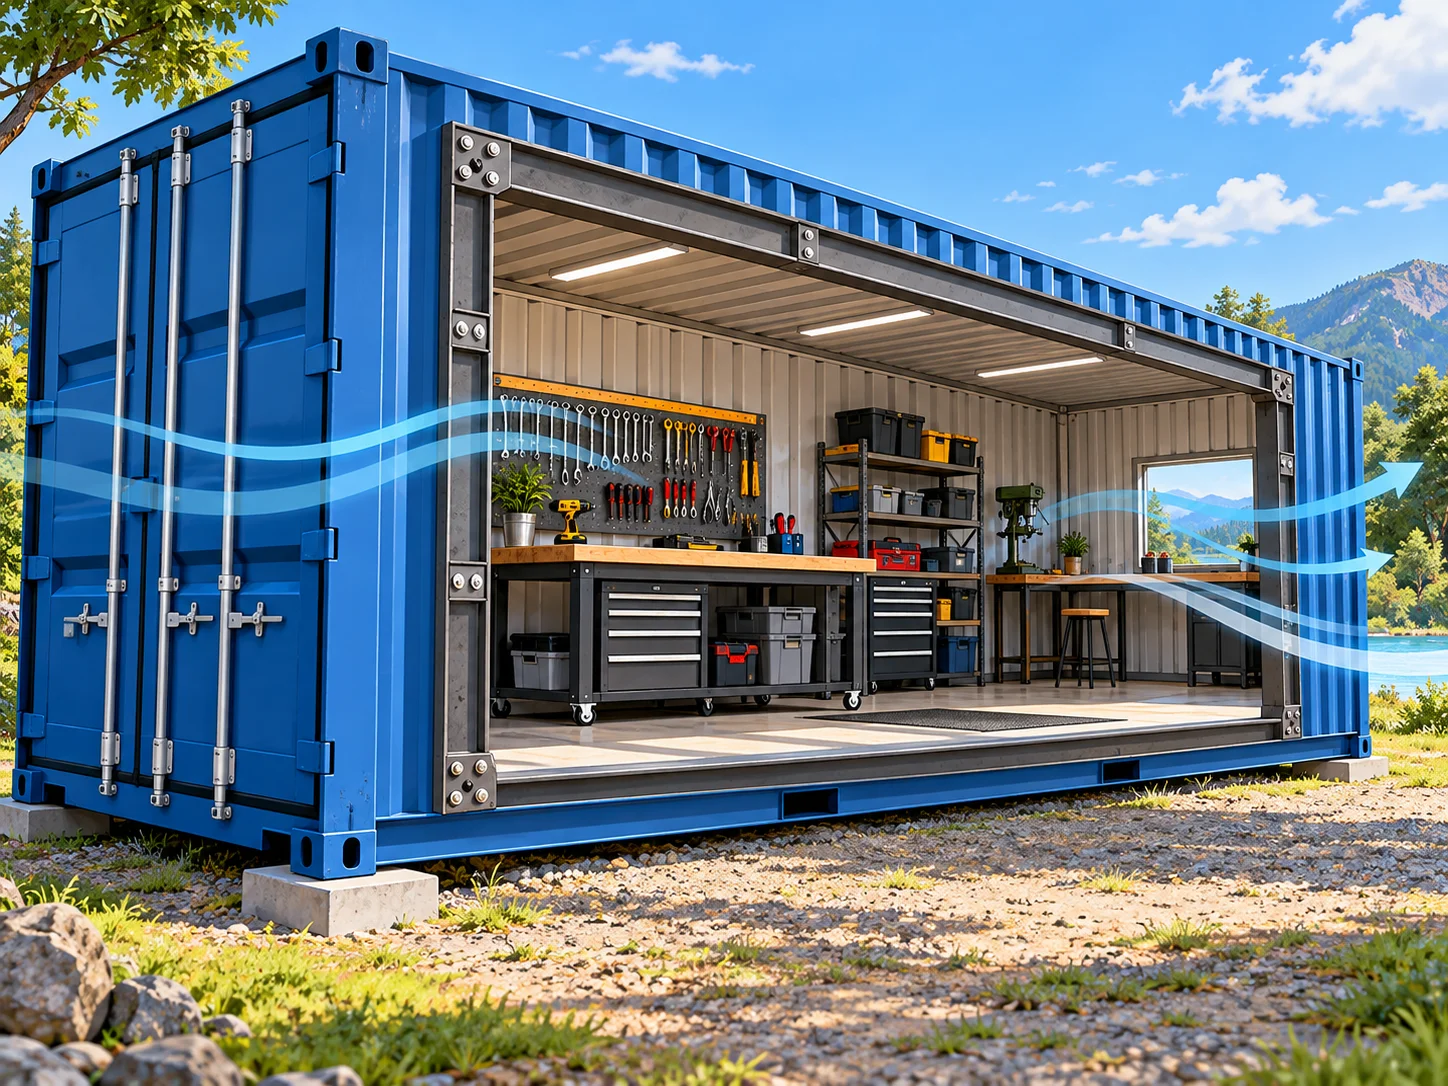
An enclosed steel container can become uncomfortable in direct sun. For this build, we create a large side opening to bring more air into the workspace.
The opening also makes the shop feel more connected to the area outside and provides additional access and filming angles.
Before making a similar modification, we need the opening and reinforcement designed together. Removing a large section of wall changes the container’s structure, so the cutout needs more planning than simply marking a rectangle.
 3. Reuse the cutout panel as a canopy
Instead of discarding the steel removed from the sidewall, we turn it into a top-hinged panel.
When closed, it covers the opening. When raised, it becomes an overhead canopy that provides shade and some shelter above the work area.
That gives one component two jobs and makes use of material already on hand.
The raised panel also creates a large surface exposed to wind. Its frame, hinges, supports and connections need to be designed for both the open and closed positions.
4. Build a frame around the moving panel
The cutout needs a frame to function as a door rather than a loose sheet of corrugated steel.
We prepare the edges and assemble framing around the panel and opening. Getting the components aligned takes time, particularly where the hinge and lifting hardware will connect.
This stage also reveals how heavy the finished assembly will be. Adding framing changes the panel’s weight, which matters when selecting hardware to lift and support it.
We plan the complete assembly before treating any individual component as finished.
5. Use lifting hardware suited to the panel
The original idea was to lift the panel with a temporary rope arrangement. Once the weight and handling difficulties became clear, the project moved to gas struts.
The struts assist the opening movement, making the large panel more manageable.
For another build, we would select the hardware around the panel’s weight, center of gravity, mounting geometry and travel. A force rating alone doesn’t establish that a strut will work in a particular position.
We also need a controlled way to support the panel during installation, before its operating hardware is ready.
 6. Check bracket alignment before operating the door
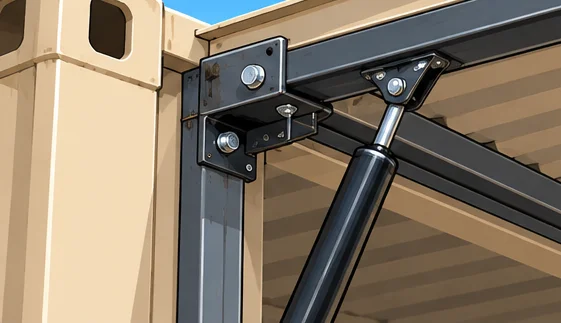
One of the biggest setbacks in this project comes from the strut mounts.
The builder attributes a bent strut to bracket misalignment caused by movement as a weld cooled. The mounts were then straightened and reinforced with additional gussets.
The lesson is to check the assembly after welding, rather than assuming the mounting points stayed where they were positioned.
We verify alignment and movement against the hardware requirements before operating the panel. Binding or sideways loading calls for a correction, not more force.
7. Add a positive hold-open mechanism
Lift assistance and secure support are separate functions.
This project includes a telescoping mechanism with a spring-loaded handle to hold the panel in its raised position. It works alongside the lifting hardware rather than relying on the gas struts alone.
For a similar installation, we need a suitably designed hold-open system and secure closed-position latches.
The panel should be supported reliably while people work beneath it, with its intended operating conditions clearly established.
8. Finish the weatherproofing and exposed steel
A functioning panel isn’t the end of the conversion.
The remaining work includes protecting the exposed steel and addressing the gap above the opening. The plan is to add an overlapping metal lip to help direct water away from that area.
We also consider the perimeter seals and how water will drain when the panel is closed.
Opening the side improves ventilation in this demonstration, but it doesn’t replace insulation or a complete temperature-control plan. Those remain separate upgrades for making the workshop comfortable across different conditions.
9. Size the off-grid power system around the tools
The workshop is intended to use a battery bank, with charging available from solar panels on a camper van.
That creates a route toward operating without a permanent grid connection, but runtime depends on the equipment we use.
We list the tools, lights and other electrical loads before sizing the power system. High-demand equipment and motor startup requirements need particular attention, along with inverter capacity and charging availability.
A setup that runs lights and charges cordless tools may have very different requirements from one powering welding or other heavy equipment.
Build a workshop that fits your projects
This conversion shows how a single container can become a more flexible workspace through a carefully planned opening, a dual-purpose canopy and supporting hardware.
It also shows why we leave room in the budget and schedule for adjustments. The lifting system needed changes, and painting, weatherproofing and future insulation remained part of the plan.
At Quality Containers, we help customers explore containers and modification options for workshops, storage and other projects. Contact our team to discuss the size and setup that fit your intended use.
Adapted into a first-person project walkthrough from “Converting a Shipping Container into an Off-Grid Shop!”